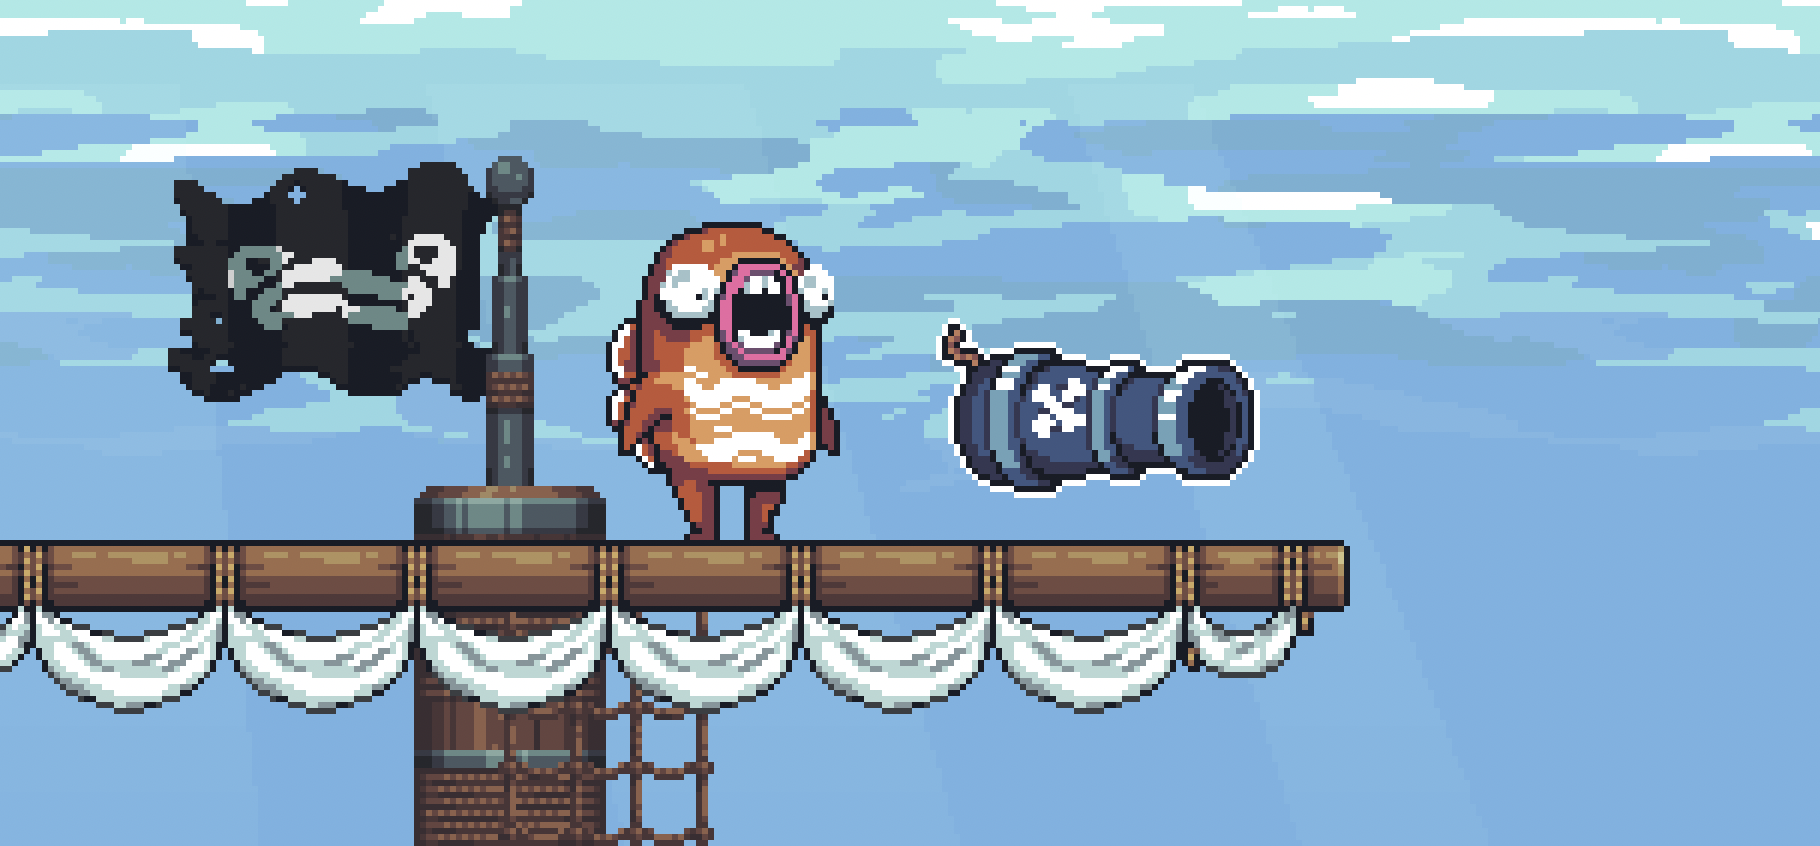
Fish Fight
![]()

Introduction
Fish Fight is a tactical 2D shooter, played by up to 4 players online or on a shared screen. Aim either left or right; the rest is up to clever movement and positioning in this fish-on-fish brawler! For more information about our origin story (Duck Game et.al.) and big-picture plans, see our design document.
Key Features (WIP)
- 2 to 4 players in either Local Multiplayer or Online Play
- Easy to pick up, emphasizing strategy over twitch reaction
- Customize characters with hats, saved to your cross-platform profile
- Create & explore user-made weapons, levels, audio and other scripted extensions
- Smart level creation tools
- Tournaments & matchmaking built in
Status
The game is fully playable:
https://twitter.com/fishfightgame/status/1424084016467226624
Community
Contributing
Anyone involved in the Fish Fight community must follow our code of conduct.
If you'd like to make something for Fish Fight, check out our help-wanted issues or just ask us on Discord. We'll soon post an updated roadmap for the next month or two of work ahead.
Before committing and opening a PR, please run the following commands and follow their instructions:
cargo clippy -- -W clippy::correctness -D warningscargo fmt
Learning Materials
- https://macroquad.rs/tutorials/fish-tutorial/
- https://not-fl3.github.io/platformer-book/intro.html
- https://sokoban.iolivia.me/ (we do not use an ECS)
- https://pragprog.com/titles/hwrust/hands-on-rust/
Install & play
- Install Rust with Rustup.rs
cargo run
We'll start distributing executables shortly!
Default key bindings
Keyboard left:
- movement: arrow keys
↑,←,↓,→ - pick/drop:
K - attack:
L - toggle AI:
0
Keyboard right:
- movement:
W,A,S,D(&Spacefor jump) - pick/drop:
C - attack:
V&LeftCtrl - toogle AI:
1
Gamepad:
- movement: direction axis
- pick/drop:
X - attack:
B - jump:
A - slide:
Down+Y
Credits
- Input Icons: Kadith's Icons by Kadith
Contributor Covenant Code of Conduct
Our Pledge
We as members, contributors, and leaders pledge to make participation in our community a harassment-free experience for everyone, regardless of age, body size, visible or invisible disability, ethnicity, sex characteristics, gender identity and expression, level of experience, education, socio-economic status, nationality, personal appearance, race, religion, or sexual identity and orientation.
We pledge to act and interact in ways that contribute to an open, welcoming, diverse, inclusive, and healthy community.
Our Standards
Examples of behavior that contributes to a positive environment for our community include:
- Demonstrating empathy and kindness toward other people
- Being respectful of differing opinions, viewpoints, and experiences
- Giving and gracefully accepting constructive feedback
- Accepting responsibility and apologizing to those affected by our mistakes, and learning from the experience
- Focusing on what is best not just for us as individuals, but for the overall community
Examples of unacceptable behavior include:
- The use of sexualized language or imagery, and sexual attention or advances of any kind
- Trolling, insulting or derogatory comments, and personal or political attacks
- Public or private harassment
- Publishing others' private information, such as a physical or email address, without their explicit permission
- Other conduct which could reasonably be considered inappropriate in a professional setting
Enforcement Responsibilities
Community leaders are responsible for clarifying and enforcing our standards of acceptable behavior and will take appropriate and fair corrective action in response to any behavior that they deem inappropriate, threatening, offensive, or harmful.
Community leaders have the right and responsibility to remove, edit, or reject comments, commits, code, wiki edits, issues, and other contributions that are not aligned to this Code of Conduct, and will communicate reasons for moderation decisions when appropriate.
Scope
This Code of Conduct applies within all community spaces, and also applies when an individual is officially representing the community in public spaces. Examples of representing our community include using an official e-mail address, posting via an official social media account, or acting as an appointed representative at an online or offline event.
Enforcement
Instances of abusive, harassing, or otherwise unacceptable behavior may be reported to the community leaders responsible for enforcement at e.soghe@gmail.com. All complaints will be reviewed and investigated promptly and fairly.
All community leaders are obligated to respect the privacy and security of the reporter of any incident.
Enforcement Guidelines
Community leaders will follow these Community Impact Guidelines in determining the consequences for any action they deem in violation of this Code of Conduct:
1. Correction
Community Impact: Use of inappropriate language or other behavior deemed unprofessional or unwelcome in the community.
Consequence: A private, written warning from community leaders, providing clarity around the nature of the violation and an explanation of why the behavior was inappropriate. A public apology may be requested.
2. Warning
Community Impact: A violation through a single incident or series of actions.
Consequence: A warning with consequences for continued behavior. No interaction with the people involved, including unsolicited interaction with those enforcing the Code of Conduct, for a specified period of time. This includes avoiding interactions in community spaces as well as external channels like social media. Violating these terms may lead to a temporary or permanent ban.
3. Temporary Ban
Community Impact: A serious violation of community standards, including sustained inappropriate behavior.
Consequence: A temporary ban from any sort of interaction or public communication with the community for a specified period of time. No public or private interaction with the people involved, including unsolicited interaction with those enforcing the Code of Conduct, is allowed during this period. Violating these terms may lead to a permanent ban.
4. Permanent Ban
Community Impact: Demonstrating a pattern of violation of community standards, including sustained inappropriate behavior, harassment of an individual, or aggression toward or disparagement of classes of individuals.
Consequence: A permanent ban from any sort of public interaction within the community.
Attribution
This Code of Conduct is adapted from the Contributor Covenant, version 2.0, available at https://www.contributor-covenant.org/version/2/0/code_of_conduct.html.
Community Impact Guidelines were inspired by Mozilla's code of conduct enforcement ladder.
For answers to common questions about this code of conduct, see the FAQ at https://www.contributor-covenant.org/faq. Translations are available at https://www.contributor-covenant.org/translations.
Gameplay
Controls
Keyboard Right
| Key | Action | |
|---|---|---|
| Up |  | Jump |
| Down |  | Crouch |
| Left |  | Move left |
| Right |  | Move right |
| K |  | Pickup/Drop |
| L |  | Attack |
| 0 |  | Toggle AI |
Keyboard Left
| Key | Action | |
|---|---|---|
| W |  | Jump |
| S |  | Crouch |
| A |  | Move left |
| D |  | Move right |
| C |  | Pickup/Drop |
| V |  | Attack |
| 1 |  | Toggle AI |
Gamepad
| Input | Action | |
|---|---|---|
| A Button |  | Jump |
| Y Button |  | Crouch |
| Left Thumbstick |  | Move left |
| Right Thumbstick |  | Move right |
| X Button |  | Pickup/Drop |
| B Button |  | Attack |
Items
Items are placed in levels and can be interacted with by players.
| Name | Description | |
|---|---|---|
| Sword | 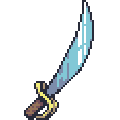 | Standard melee weapon. |
| Musket | 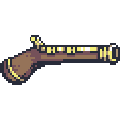 | Fires up to three bullets, normal recoil, normal bullet speed. |
| Sniper Rifle | 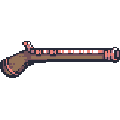 | Fires up to two bullets, high recoil, high bullet speed. |
| Machine Gun | 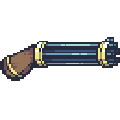 | Fires many bullets, low recoil, normal bullet speed. |
| Cannon | 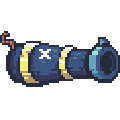 | Fires up to three bombs, normal recoil. |
| Turtle Shell |  | Blocks two attacks from behind, then breaks. |
| Grenades |  | Throws up to three bombs that explode after short duration or on impact. |
| Mines | 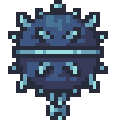 | Place up to three mines that explode on contact. |
| Kick-Bomb |  | Explodes a set period of time after being thrown. Can be kicked by players. |
| Blunderbuss | 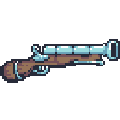 | Fires up to two spread shots, each containing five bullets. |
| Blunderbass |  | A blunderbuss that ate the Fish-Fish fruit. |
Multiplayer
Connection process in the FishFight is extremely low-level right now.
We do not have matchmaking server and we want to collect data and network setups and possible problems before doing the process fully automatic.

The only supported game mode right now: 1v1.
Connection Types
LAN
When both computers are connected to the same router: are on the same wifi, home network etc.
Send your local IP from "Self addr" field to your opponent, click "Probe connection" and if connection can be established - click "Connect".
STUN
When each player is under a NAT. Usually when its two players over internet with different network providers. This option may work, but may not, it depends on the type of nat, router configs etc.
Idea is exactly the same as with LAN: copy-paste your own "Self addr" over discord, probe connection, if it works - click "Connect"
Relay
When both players are on remote computers over internet, but STUN connection did not worked and router reconfiguration is not an option - there is a relay server available.
Relay server will introduce additional LAG - each packet will be forwarded through a server.
Connection idea is still the same, but instead of IP "Self addr" will be an ID on the relay server. Copy-paste it over internet, set "Opponent addr", push "Connect"
Router Configuration
When STUN server failed, but Relay is too slow - there is a way to improve gameplay experience. Go to router settings and forward ports 3400, 3401, 3402, 3403 to computer with the FishFight.
It still may depend on the internet provider, maybe the router itself is behind some global, provider NAT or something.
TODO: Make a better "Router configuration" section here.
Mechanics
Physics
As you might already know, Fish Fight is a homage to the excellent Duck Game and thus we have chosen to replicate the rather simple and straight forward linear physics found in that game. It follows standard platformer physics, with force being translated to two-dimensional velocity, acting against gravity and drag, every physics update (fixed_update).
The same physics system is used in Towerfall and Celeste.
To learn more about basic game physics, as they are implemented in Fish Fight, you can explore the following sources:
[Ask us about missing links!]
Fish Fight's physics implementation
As for the specifics of Fish Fight, I will elaborate in the following paragraphs. Please note, however, that the game is currently in a very early prototype stage, so the implementation is neither perfect nor, in any way, optimized, at this stage.
Scene nodes
The game uses the Macroquad library, by Fedor, who is also part of the core team of Fish Fight. This means that our scenes are composed of scene nodes, made by implementing the Node type. The most relevant method, when discussing physics, is the fixed_update method, which is called for every node, every physics frame. This means that, in order to explore the existing physics of any existing in-game object, you should browse to the corresponding node source file, in src/nodes, and look for the impl Node for T section and the encapsulated fixed_update implementation.
This method takes a RefMut<T> as an argument (can be both mutable and immutable), where T is the type of the node that it is being implemented for. From here, you can do many things; like manipulating the node, itself, through the RefMut<T> parameter, as well as access other nodes by fetching them from the scene, either by type, or by specific traits, made by calling node.provides([...]) in a nodes ready implementation. For examples of this, you can check the code of most nodes for the code providing the Sproingable trait, for example.
Examples of code for accessing other nodes:
#![allow(unused_variables)]
fn main() {
// This is from the ArmedGrenade node, showing how we iterate over players, checking for
// collision and killing the player if the explosion "collides" with the player
for mut player in scene::find_nodes_by_type::<crate::nodes::Player>() {
    let intersect =
        grenade_rect.intersect(Rect::new(
            player.body.pos.x,
            player.body.pos.y,
            PLAYER_HITBOX_WIDTH,
            PLAYER_HITBOX_HEIGHT,
        ));
    if !intersect.is_none() {
        let direction = node.body.pos.x > (player.body.pos.x + 10.);
        scene::find_node_by_type::<crate::nodes::Camera>()
            .unwrap()
            .shake();
        player.kill(direction);
    }
}
}
#![allow(unused_variables)]
fn main() {
// This is from the Sproinger node, iterating through nodes providing the Sproingable trait
// and checking for collision, before performing a "sproing" on them, if they overlap
for (_actor, mut body_lens, size) in scene::find_nodes_with::<Sproingable>() {
    if body_lens.get().is_some() {
        let body = body_lens.get().unwrap();
        if body.speed.length() > Self::STOPPED_THRESHOLD {
            let intersect = sproinger_rect
                .intersect(Rect::new(body.pos.x, body.pos.y, size.x, size.y));
            if !intersect.is_none() {
                let resources = storage::get_mut::<Resources>();
                play_sound_once(resources.jump_sound);

                body.speed.y = -Self::FORCE;
                node.has_sproinged = true;
                // self.sprite.set_animation(1);
                // self.sprite.playing = true;
                Sproinger::animate(node.handle());
            }
        }
    }
}
}
Collision
Collision between nodes is done by creating collider Rect or Circle objects and calling their intersect (Rect only) or overlaps methods. The former will return anOption<Rect>, where the contained Rect represents the intersection between the two colliding Rect objects, or None, if there was no intersection. The latter will return a bool that is true if there was any overlap between the two objects. To check for collisions with the map, you have several methods in the scene module that lets you check for collisions on the various map layers. For examples of map collisions, once again, the Player implementation is a good place to start. Furthermore, PhysicsBody members may hold a collider that Macroquads physics engine will collide against Solid objects in the scene (ground tiles, for the most part). These colliders will have to be added to the collision world, as actors. See the constructor of the player node for an example of how this is done.
NOTE: To get the hitbox of a Player node, use Player::get_hitbox(), so that you get the correct size if the player node, for example, is in a crouched state.
Force
When it comes to enacting force on nodes, this is done by setting a speed on a node. Most nodes will have a body, but not all, as the primary use for a body is to hold a collider. For simpler nodes, we might just put a position vector and a speed vector directly on the node, in stead. This can be checked in the specific nodes implementation. As mentioned, we set the velocity directly, in stead of accumulating force over several frames, as this leads to much more predictable and precise game physics (the age old Mario, using acceleration, vs Megaman, using binary force, dichotomy).
This means that, in order to implement an explosion, for example, you would decide on a force, find the node(s) that the explosion will act upon and apply this force by setting the speed of the node, or the nodes body, depending on its implementation, to the value of the force in the appropriate direction. See below for a simplified example of something exerting a force, on the x-axis, on a player, if an arbitrary hit check condition is fulfilled:
#![allow(unused_variables)]
fn main() {
impl T {
    pub const FORCE: f32 = 900.0;
}

impl Node for T {
    for mut player in scene::find_nodes_by_type::<crate::nodes::Player>() {
        [hit detection]
        if is_hit {
            let direction_is_right = node.body.pos.x > (player.body.pos.x + 10.);
            player.body.speed.x = if direction_is_right {
                FORCE
            } else {
                -FORCE // negative force
            }
        }
    }
}
}
The same methods would be used for movement, for example, but instead of checking for a collision, you would check for input. For examples of this, check out the player node implementation.
Environmental weapons
Environmental weapons are weapons that don't follow the structure of weapon and projectile, rather, they spawn one or more entities intended to harm enemy.
Document notes
This document doesn't explain all the concepts, since some are already explained in Physics.
EW is used as abbreviation for Environmental Weapon.
Mechanics and examples
For each pickup, it's possible to spawn the weapon only once; after usage, most will disappear entirely from the level.
Currently, there are a few EWs:
- Curse: a skull that chases the closest enemy, in a sinusoidal motion, for a limited amount of time;
- Galleon: a large vessel that crosses the screen horizontally;
- Shark rain: a group of sharks falling vertically from the top, at random horizontal positions.
EWs may, or may not, self-pwn the owner.
Code design
EWs are typically designed in two main types: the item, which is what the player can pick up/hold/throw, and the weapon itself, which is the set of entities that are summoned and harm the enemies.
The general design is very similar to all the other weapons, with a few distinctions.
The shoot() routine, itself common to the other weapons, is a good starting point:
pub fn shoot(galleon: Handle<Galleon>, player: Handle<Player>) -> Coroutine {
    let coroutine = async move {
        /* ... */

        if galleon.used {
            player.state_machine.set_state(Player::ST_NORMAL);
            return;
        }

        galleon.used = true;

        FlyingGalleon::spawn(player.id);

        player.weapon = None;

        /* ... */

        galleon.delete();

        player.state_machine.set_state(Player::ST_NORMAL);
    };

    start_coroutine(coroutine)
}
A very important concept is that we must avoid race conditions on multiple shots. Since shooting is asynchronous, on the first shot, we need to set a flag (in this case, used) that makes other concurrent executions return.
Most EWs are usable only once per level; this is implemented by removing the weapon from the player (see above), and deleting the item from the node graph.
Since most of the EWs don't kill the owner, we store the Player id in the spawned type, and skip it on collision test:
pub struct FlyingGalleon {
    /* ... */
    owner_id: u8,
}

impl scene::Node for FlyingGalleon {
    fn fixed_update(mut flying_galleon: RefMut<Self>) {
        /* ... */

        for mut player in scene::find_nodes_by_type::<crate::nodes::Player>() {
            if player.dead {
                continue;
            }

            if flying_galleon.owner_id != player.id {
                /* Collision test here */
We also check if a player is dead, before performing the the collision check: since the EWs are generally large, performing the test multiple times is not correct; for example, it has the immediate effect of causing multiple death effects.
EWs typically need to know the boundaries of the map; see the FlyingGalleon#start_position_data() routine:
fn start_position_data() -> (Vec2, bool) {
    let resources = storage::get::<Resources>();

    // We query the map size from the raw tiled map data:

    let map_width =
        resources.tiled_map.raw_tiled_map.tilewidth * resources.tiled_map.raw_tiled_map.width;
    let map_height =
        resources.tiled_map.raw_tiled_map.tileheight * resources.tiled_map.raw_tiled_map.height;

    // Note also how we generate a random boolean via MacroQuad `rand` APIs:

    let (start_x, direction) = if gen_range(0., 1.) < 0.5 {
        (0. - FLYING_GALLEON_WIDTH, true)
    } else {
        ((map_width - 1) as f32, false)
    };

    let start_y = gen_range(0., map_height as f32 - FLYING_GALLEON_HEIGHT);

    (vec2(start_x, start_y), direction)
}
Netcode
The netcode in Fish Fight is something called delay-based netcode by many players, but is more specifically deterministic lockstep. A peer-to-peer architecture that is completely deterministic.
This video was the main inspiration for our netcode architecture:
What is described from 6:09 to 7:15 is the current state of our netcode. The video proceeds to explain the limitations of this approach and how they iterated from there to what can more accurately be called GGPO. That is where we are headed as well, beginning with a minimal foundation that we have a full grasp and agency over. From the intentionally naive “Player Unhappy” model we will gradually work our way towards “Player Very Happy”.
Terms and Concepts
Before we go any further, let’s explain some terms and concepts.
First off, what makes online multiplayer games difficult to make? There are two main issues: (1) The latency (travel time) for information over the internet, and (2) when circumventing that, ensuring that nobody can cheat while also fairly integrating everyone’s input. What’s important isn’t that the solution is ”correct”, but that it feels great to your players. Game networking consists largely of clever tricks and smoke and mirrors, all to disguise the inherent limits of space-time.
A peer/client is someone who joins an online game session. (We will use these terms interchangeably, but there might be reasons to differentiate the two). For example, when you play Minecraft, you join servers as a client. Most games these days use a server-client architecture, where clients will join a server that handles everything in the online game session, and streams necessary data to the clients.
However, this isn’t the only way of handling things. Indeed, before the server-client architecture became commonplace, there was the peer-to-peer (P2P) architecture. Instead of relying on an authoritative server to tell the clients what’s happening, the peers instead tell EACH OTHER what is happening. This means that any one peer has to send out data to every single other peer, and as such the required bandwidth scales linearly as more players join. For this reason most games just use the server-client system for anything more than 6-8 players. However, for a game like Fish Fight which will only have 2-4 players in any one given match, a peer-to-peer system will make more sense.
This has several benefits. First and foremost, there’s no need to pay for hosting. While for a small project like Fish Fight, with a relatively simple simulation, that cost would likely be low. But there’s a plethora of problems that must be addressed: that cost isn’t zero and still has to be paid somehow, and if the game gets immensely popular the price will quickly skyrocket. And then you must also write a load distribution system, and DDOS protection, the list goes on. A peer-to-peer architecture offloads all the costs to the players, who are in any case already running the simulation. This also means that you don’t need to maintain two separate client and server codebases, that must exactly line up in behaviour. Peer-to-peer might even offer lower latency, since the packets don’t have to go back and forth through a server.
This is because hosting servers is EXPENSIVE. For example, hosting a Minecraft server on Minecraft Realms is $8 dollars per month. That’s not much, but it's only one session. If we assume that this will “only” have a max player count of 40 people per day, that means we have to host 10 servers. That means $80 dollars per month. This doesn’t even take into account all of the other things we might have to worry about when developing a server-client architecture, like having to maintain two different codebases at the same time.
As such, making a peer-to-peer game makes sense at this scale. However, any one who wants to make an online multiplayer game MUST understand that every multiplayer solution is specialized to your use-case. The server-client architecture has many other benefits, mainly scalability. But also, in Fish Fight there is no persistent state or complex systems that must always be online. The ”servers” in P2P go offline as soon as a player quits.
The Authority is whoever decides what is true, and can overwrite anyone else’s state. The authority isn’t necessarily one party, but rather authority is held over singular objects or values. For example, a player might hold authority over a ball they are kicking, so they don’t have to ask the server for confirmation before interacting resulting in a snappier experience. This isn’t exactly applicable in a lockstep P2P architecture, but is foundational for client-servers so you’ll likely see the term if you ever read anything about networking. In those cases the server is almost always the authority, so the players can’t cheat.
Listen Servers are a network architecture/topology not to be confused with peer-to-peer. It is simply a client-server architecture where one of the clients hosts the server. This combines the cost benefits of a P2P topology while also allowing for better lag compensation methods. It still requires the same bandwidth as P2P, but only for the client who is running the server so the game is no longer capped by the slowest connection. Fish Fight might eventually move to this topology or move to a P2P model.
Ping/Latency/Round Trip Time all relate to the time it takes for a message to travel over a network. Latency is the time it takes to travel from the sender to the recipient, while Round Trip Time (RTT) and Ping refers to the time it takes both back and forth. RTT however is not necessarily twice the latency, although often very close. On the network, different conditions and even routes means that times will vary.
Jitter is related to latency, and is the amount by which it varies. A bad connection does not only have long latency, but the time it takes for packets to arrive will also vary greatly. This is a major hindrance when you want data to arrive in a smooth and regular manner, such as frames in a video, sound in a voice chat or input for a player. This is managed by adding a Buffer, which stores values for a short while and then dispenses them like an even flow. The tradeoff is that the fastest packets are slowed down to be in time with the slowest packets, leading to an overall slowdown.
Then there’s Packet Loss, where a packet gets completely lost at some crossroad of the internet. Bad connections also means that not all packets will arrive. This is countered by adding Redundancy. Common ways to compensate is to send packets multiple times, so at least one is likely to arrive, or send a confirmation once a packet is received. If the confirmation is not received, resend the packet until you get a response.
For some slightly more low-level things that you can do without:
TCP/UDP relates to packet loss. UDP is a transport protocol on the IP stack that “simply” sends messages, fire-and-forget, with no regard to whether it arrives. TCP on the other hand has more overhead but guarantees that your messages arrive. FishFight uses UDP for speed, and implements a custom redundancy layer on top of that for extra performance. TCP is often overkill, and a custom built solution almost always works better since it can exploit the exact workings of your game. Overhead is the extra data that is sent every packet, and adds to the required bandwidth. By sending more data per packet, the overhead will make up a smaller part of the data sent.
Delayed Lockstep
Anyways, we explained the peer-to-peer part, but you’re probably wondering what is deterministic lockstep. Gaffer on Games already wrote about this in an article you can read here, but in summary.
At its very basics, lockstep works by collecting input from every player and then simulating one frame once all input is gathered. In other words, the only thing that gets transmitted between players is their input. Input often can be packed into a single byte, and therefore very little bandwidth is required. When the input then arrives, the simulation is advanced one step. Since everyone waits for input from each other, everyone steps in sync.
But however small the packets are, the latency will remain largely the same. To wait for every player to send their input each time would mean that the game can not update faster than (in the best case) 1/RTT/2 Hz (confirmation can be sent later). If you want your game loop to run at 60Hz, you can’t have an RTT over 30 ms which is difficult to achieve outside of wired and geographically small networks.
Enter: Delayed Lockstep. The ”delay” part is an input buffer that stores inputs for a short while before executing them. Now every input packet also contains a frame timestamp so that all remote input can be matched up with the local input and executed at the same frame. As input rolls in it is stored in the matching slot in a buffer, and by the time a frame should be simulated the corresponding buffer slot should be filled with input from all players. The latest input is then popped off the buffer, which shifts one frame forward, and the game progresses one step. By maintaining this buffer (barring major interruptions) the game always has input at hand, and can as soon and as quickly as it wants. But as you might guess, there’s a tradeoff, and that is of course the added delay. The remote players already have some delay so it doesn’t matter too much, but the local input must be slowed down to match the slowest player, leading to slower response to keyboard input. To minimise this delay, the buffer should be as short as possible. To give everyone’s input time to arrive the buffer must be as long as the slowest players ping + their jitter. To improve the experience, your networking should continually measure how long it is between the last player’s input arriving and the buffer running out, and then adjusting the buffer to be as short as possible. A too long buffer means unnecessary input delay, but if the buffer is too short and runs out the game must freeze until input arrives. It’s a fine line to walk, but it’s usually better to lean towards too long than having interruptions.
However, there’s one big, or rather HUGE, issue: Determinism. Since all that is sent between clients is their inputs, one requirement must be met. Given the same world state and inputs, every time, on every computer, OS, architecture, instruction set, etc. etc. the game must be able to generate the exact same next frame. The tiniest deviation accumulates and quickly makes the game unplayable. The main source of nondeterminism is floating point arithmetic. Performing operations with floating point numbers famously produces varying results, which depends on many factors. Random number generators must also be kept in sync.
We want to reduce the amount of data being sent online by each peer, AND we don’t want to have people hack the game. The way to do this then, is to have players only send their inputs to each other, so that you can’t have people change their position all willy nilly like this.
However, we want to make sure that when inputs are sent to each player, the game itself is fully deterministic: the same thing must happen with the same inputs every time to prevent clients from desyncing with each other. There’s a lot of ways to handle this that we not going to get into, but I’m sure could make for a very interesting separate article.
For now, we are going to assume that the game itself is fully deterministic and just take a look at the code itself in src/nodes/network.rs.
We are first going to take a look at the data being sent online, the packets. In this case, the packets in network.rs are called messages, which is what they are so it makes sense.
#![allow(unused_variables)]
fn main() {
#[derive(DeBin, SerBin)]
enum Message {
    Input {
        // position in the buffer
        pos: u8,
        // current simulation frame
        frame: u64,
        input: Input,
    },
    Ack {
        // last simulated frame
        frame: u64,
        /// bitmask for last 8 frames
        /// one bit - one received input in a frames_buffer
        ack: u8,
    },
}
}
Each message has two different parts to it. It has an Input struct, which contains the position in the input buffer, the frame that the game is currently on, and the actual input. It also has an Ack struct (which is sent to assure the other clients they received their input) that contains the frame the game is on. The Ack struct also has a bitflag that tells what inputs they got from what clients.
Now, the person reading this might wonder: why is there an input buffer here? Well, we forgot to mention one thing. See, in the real world, deterministic lockstep doesn’t actually work. Well, it doesn’t work the way you might think at first.
Every packet being sent online is always going to have a little bit of delay to it (latency) since there is going to be some distance that is covered by the packet as it travels. Even at the speed of light, it still takes a nanosecond for a packet to get across from one side of the room to the other.
As such, if you were to have a naive interpretation of deterministic lockstep without accounting for latency, it would just freeze every single frame as it waits for inputs to appear.
This image taken from Infil’s article about the netcode in Killer Instinct (with permission!) should show what that looks like.
(Note that this isn’t actually delay-based netcode either, but that’s a discussion for another time)
What instead is done is adding in an artificial delay to the program itself, and having a buffer of input of a certain amount of frames. This allows the inputs time to arrive.
When the inputs come to the other players, it gets added into the input buffer which also lasts a certain amount of frames. This means that most moves and stuff feel noticeably slower with added delay.
This concludes part 1 of our "Netcode Explained" series. In part 2 we will do a code walk-through and piecemeal analysis.
Written by Srayan “ValorZard” Jana and grufkok, with editing by Erlend
Juice and Feel
Juice, or game feel, is the science and art of making pushing a button viscerally satisfying. Well, more precisely it's about giving feedback to confirm the player's actions. For games where flow and feeling matter, juice is the thing that makes the player understand your game without reading dials and processing numbers. Juice gives a game life and soul that makes the player feel like a part of the world. Juice is what makes a game feel fun without actually making any mechanical difference. And juice might just be what makes or breaks your game.
Whenever you do something in real life you get a wide range of sensory input in return indicating that what you tried to do actually happened. That response grounds you and makes you realise the reality and weight of things. As you might guess, replicating that kind of feedback on a flatscreen is hard. To get anywhere near reality you need hyperreal effects and nerve-blasting feedback to fill in for all the missing senses, all the while walking the fine line of overloading your player and making a dry, unresponsive world.
Of course, not all games need equal amounts of juice. Some games are played mostly in your head, and therefore all that visual feedback is not needed. Civilization has little more than flavour animations when a unit attacks, a town is built or a nuke blows up (actually the last one is pretty nice, but the real juice is your enemy’s tears). These are rather abstract both mechanically and visually, rarely pertaining to situations and perspectives we encounter in our everyday life. These games would still work with nothing but coloured circles and lines, because the strategy and the story exists in the player’s head. These games are planning games, where the payoff is to after thousands of years of careful strategising triumph over your enemy.
On the other side of the spectrum are execution games that test your reflexes and motor skills. These are played visually with the game continually telling the player what is going on. Here, the payoff is landing that single-frame-margin combo and watching your enemy explode into a glorious cloud of gibs. The juice that in a planning game exists in the player’s head must here be given by the game.
For realistic first-person games, juicing is difficult and labour-intensive in practice but easier in concept, as you can model the feedback off reality to align with the player’s expectations. But a side-scrolling shooter like Fish Fight is more difficult in theory. I’d doubt you have a clear picture of how stylised two-dimensional fish running and shooting each other would look in real life. For something so far detached from reality, you must work a lot in the same way as with symbol drawing: finding effects that represent their real-life counterparts without actually being them. You'll have to unhinge your expectations and think out of the box to find the feel you need.
Working with game feel
The worst part about working with game feel is that it is only ever noticed if it is bad. Good game feel is only felt, never seen. If the juice is so grandiose that the player starts thinking of it, it will wear them out and possibly even make them sick if too much stuff is moving onscreen. But if there is not enough of it, the game will feel dry and lifeless. The juice is there to constantly trigger and must therefore be just right. On that matter, juicing games is more artsy compared to, for instance, UI design. There are certain guidelines to follow, but mostly it's lots of tuning and testing. The easiest way to try the feel is simply to play the game! If even mundane actions like walking feels nice, you have really succeeded.
Juicing also regards making the world feel alive by making it respond, cause and effect, to the player's actions. Whipping up dust while running or jostling foliage when walking through it are common effects that give the impression of a breathing coherent world in which all its separate parts coexist and interact. This doesn't do anything mechanically, but is equivalent to hitting a wooden crate and it not breaking. Now you maybe even shudder a bit at the thought of how lifeless, bland and plain wrong it would feel. Well, the player too has expectations on how the world should respond. Your task is to meet and feed into those expectations on all levels, from the core greyboxed mechanics to minute tweens and particle effects.
Now, for some ways to actually squeeze some juice out of your games!
Screen Shake
Screen shake is an immensely powerful tool for giving heavy, visceral feedback that disorients the player as if their whole body was actually rumbling. When the entire scene shakes the player feels it, usually without thinking of it. Regular flatscreen games are only connected to two of the players senses, vision and hearing, and that is all you have to work with. The ears can be shaken about with some explosion noises, but to equally rustle the player’s eyes you need screen shake.
Screen shake moves the player’s viewpoint around, translationally and/or rotationally, to make it appear the world is rumbling. Adding the right amount of shake is an art; it is crucial to not overdo screen shake as it can hamper readability and even make sensitive players motion sick, but at the same time it must be significant enough to be felt. People usually have very split opinions on screen shake. Some love the punch it gives, others detest the blurry jostling. Try to take a step back and don't get too caught up in the looks, the game must still be playable.
Screen shake in practice in Fish Fight
Screen shake is a lot about feel, and as such requires a lot of dialling in. In fish fight there are three kinds of screen shake: noise (Perlin) translational, sinusoidal translational and rotational. Translational noise moves the world up- and sideways, while the rotational noise rotates the world around the screen midpoint. To that, you can also make the screen shake only in a certain axis to give it directionality. Omnidirectional shaking is the most common and can be used for pretty much everything. It fits explosions really well, but won't feel out of place for anything else either. The directional type on the other hand is more specialised and can for example be used vertically for jump impacts or horizontally for guns firing sideways. This further enhances feedback and narrows its meaning down, increasing clarity and readability.
To those types there’s three parameters: magnitude, frequency and length. Magnitude affects how far the screen moves when shaking (the amplitude of the oscillation) while frequency controls how ”many” shakes happen per second. The length decides for how long the shake will last for, and the magnitude decreases over this time to zero.
By mixing and matching different values for these parameters different effects can be made. Here are a few examples:
- Gunshot: a short omnidirectional shake with low amplitude and high frequency. This gives a small kick that doesn’t move the screen too much, just enough to confirm the firing. Fish Fight supports setting multipliers for X/Y movement, so a 1 for X and a smaller number for Y makes the player feel the direction of the action.
- Explosion: a medium-length omnidirectional shake with decent amplitude and lower frequency. This makes a kind of rumble that seriously jostles the screen. The bigger the explosive the lower the frequency!
- Jump impact: a directional sinusoidal shake makes the world bounce like a spring.
To calculate the final scene position, the current position of every active shake is added together. That value is then capped using a logarithmic function so that if many explosives go off at once, the scene does not fly off-screen. The second logarithm (log2x) is useful for this, as it is almost linear from 0-1 and then quickly flattens.
Particles
Particles like those in games rarely occur in real life, as most of us go through our daily routine avoiding high-impact situations. But games tend to be a bit more forceful and violent, and that of course means heaps of particles! Particles are a great way to create dynamic and exciting effects that further give impact and weight to actions, but also make the world seem more alive and responsive. Some examples are sparks flying when a bullet hits a wall or dust blowing around in a storm.
In Fish Fight, macroquad-particles submodule is used to handle particles. While it might look rudimentary, it is deceptively so. With several particles, blending modes and curse pretty impressive effects can be made. The explosions in FishFight used to be entirely procedural! Now it is used for muzzle smoke, trails, bubbles and whatever other details will be added in the future.
Particle presets are stored in .json files, which can be either generated manually or using this excellent editor which provides previews and live tweaking. It might not be entirely up to date with the latest particle system format, but should get you up and running quickly.
Editor
The editor is a tool for designing custom levels in Fish Fight. You can use it to examine and edit existing levels, and also create your own. This chapter will contain guides on how to use all of the features the editor has to offer and even a high-level overview of its API for those who are interested in contributing to its development.
Controls
Only mouse and keyboard is supported, for now. We will implement gamepad support for the editor in the future, however.
Arrows or WASDpan mapLeft Mouse Buttonuse selected toolMiddle Mouse Buttonhold to pan mapRight Mouse Buttonopen context menuDeldelete selected object or tilectrl + Ssavectrl + shift + Ssave asctrl + Lloadctrl + Zundoctrl + shift + ZredoGtoggle gridctrl + Gtoggle object snap to gridPtoggle background parallax effect
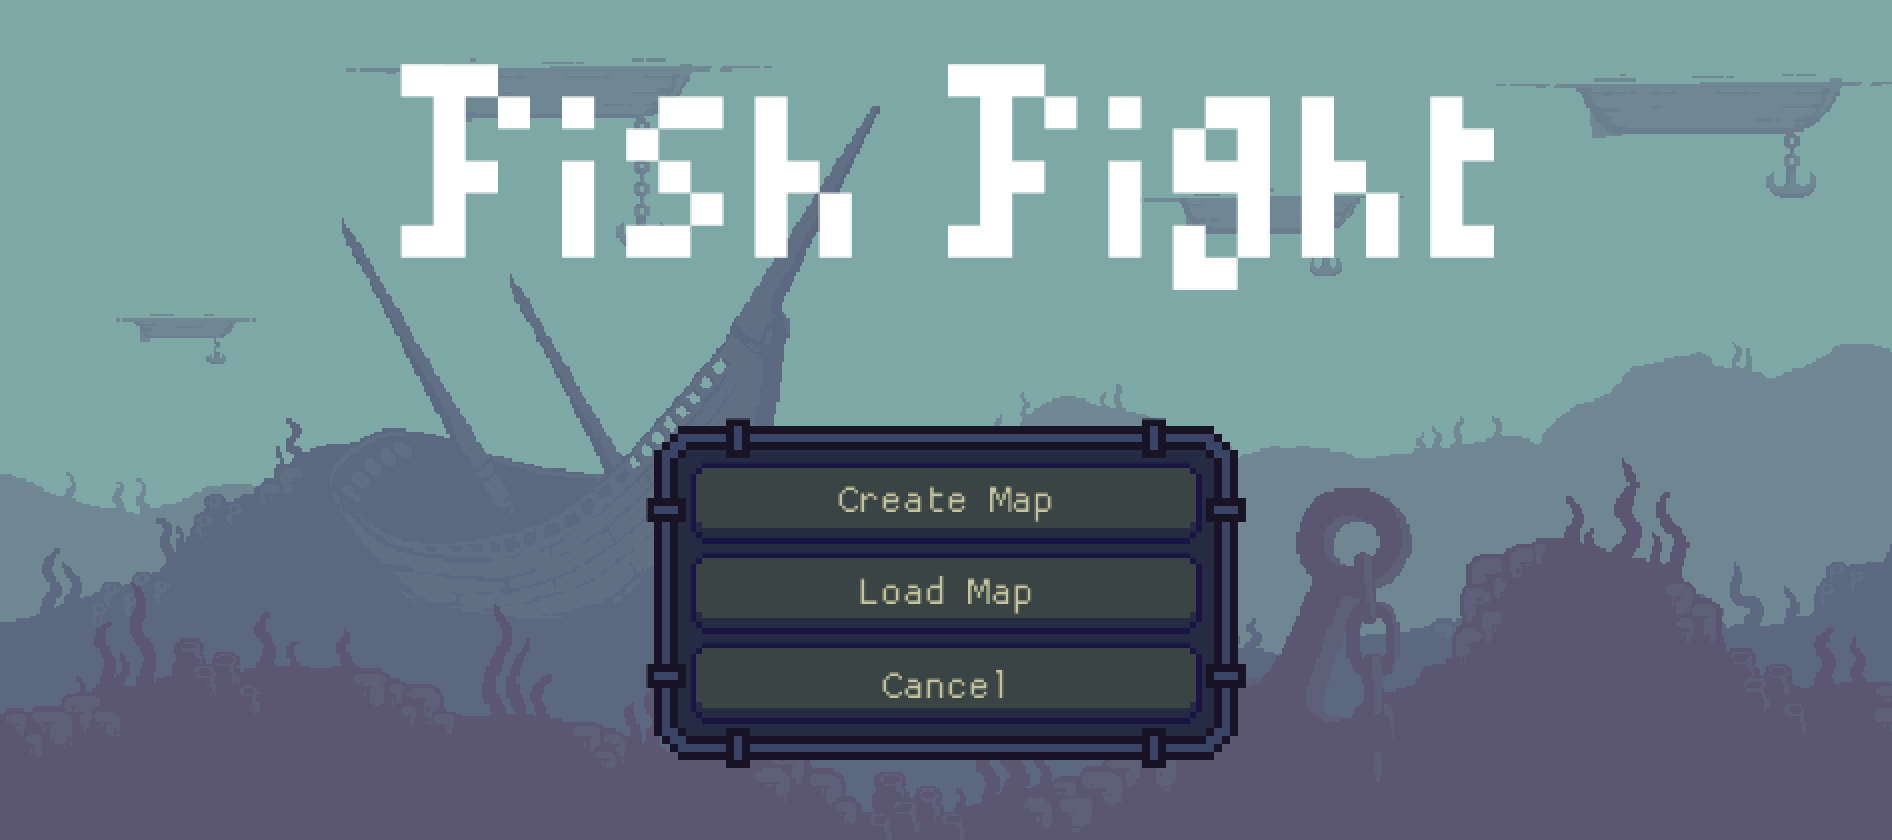
Accessing the editor
The editor can be accessed from the main menu by selecting the "Editor" option. This will then present two options: "Create Map" and "Load Map".
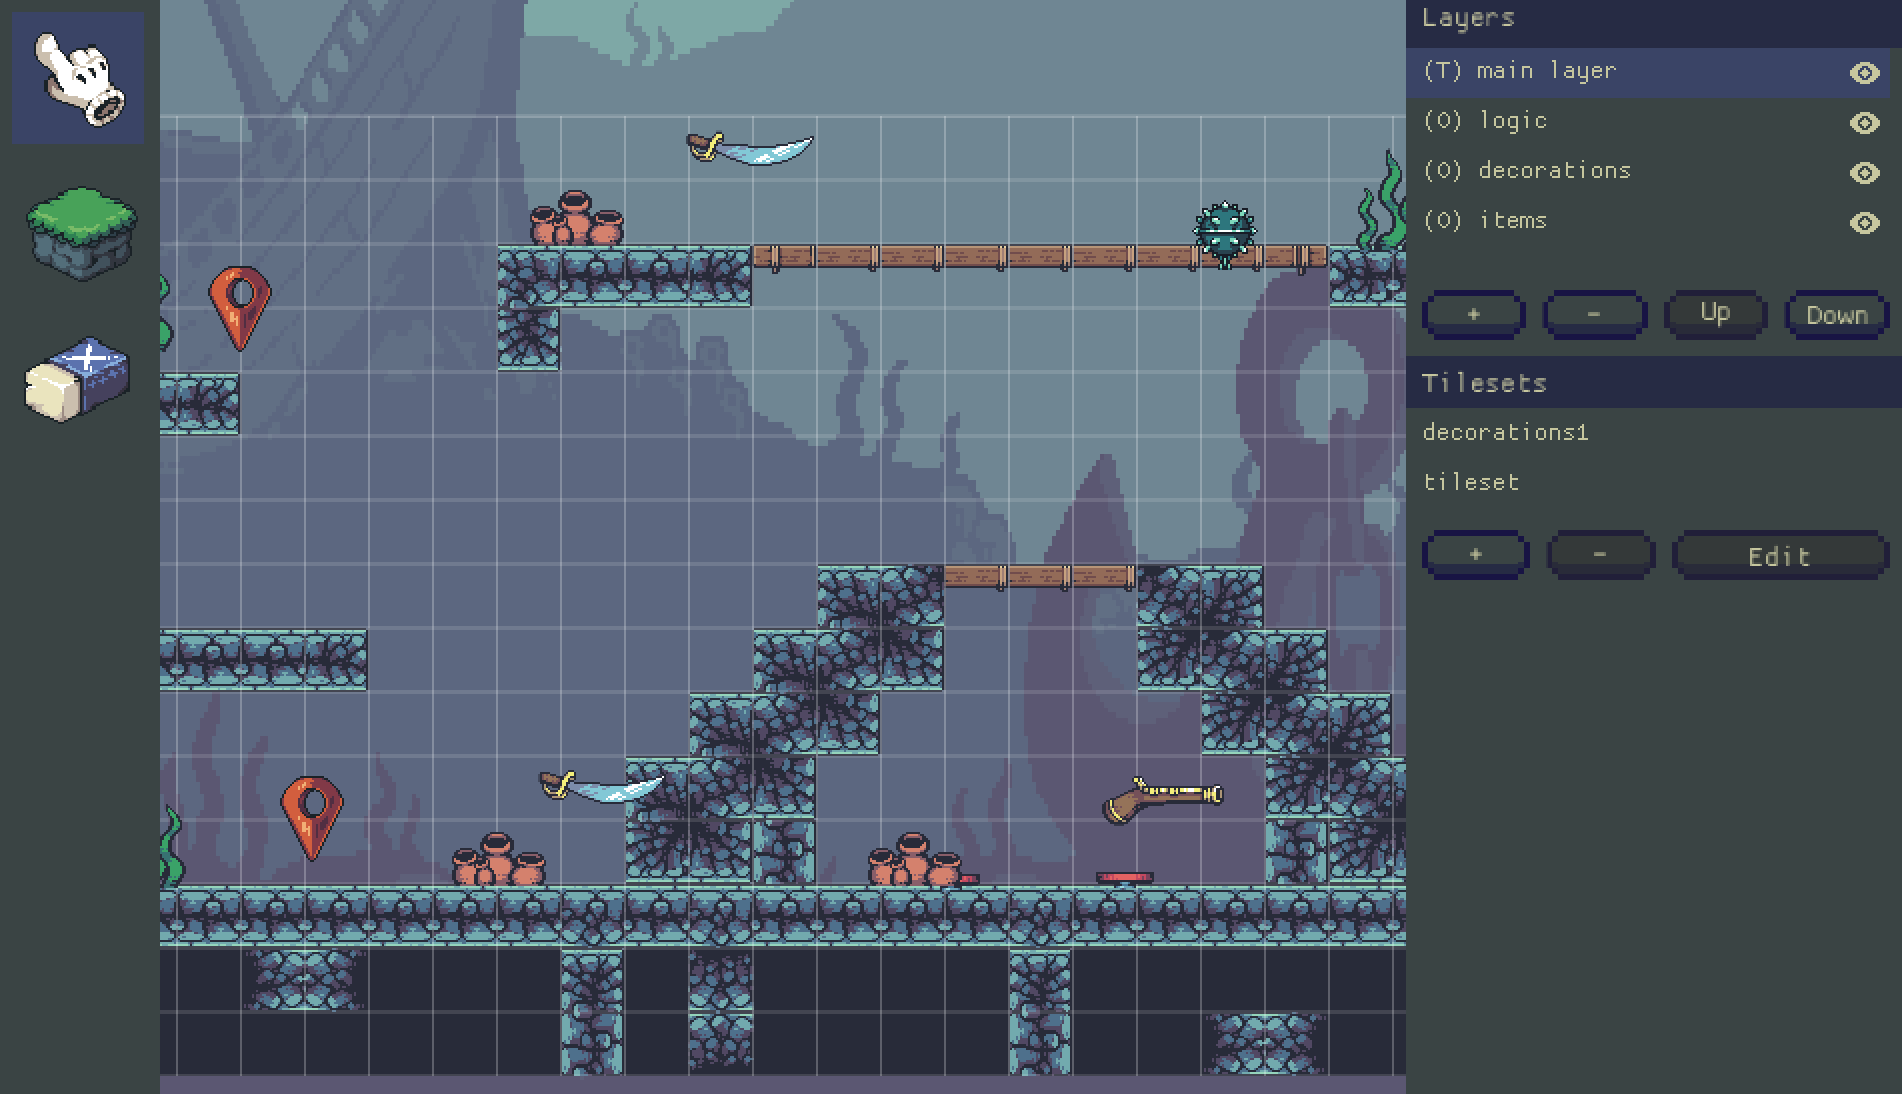
User-interface overview
There are 3 main areas of the UI for designing your level: the tool selector, map, and layers list. Perhaps the most important area is the map as it acts as a preview of your level. The tool selector and layers list are available as toolbars that provide a set of tools for you to edit and examine your level as needed.
Toolbars
There are currently 2 primary toolbars available for the editor: the layers list and tool selector.
Layers list
Create or edit layers of your Fish Fight level. This toolbar provides a list of selectable layers. Selecting a layer will display another view containing a list of the components grouped under that layer. There are currently 2 types of layers: tiles and objects:
Tile layers contain textures that can be placed in the map area. They can be created to be collision layers as well, allowing them to behave like collidable objects.
Object layers are composed of game objects categorized by a MapObjectKind. The current types of objects available are: Item, Environment, and Decoration.
Tool selector
As the name describes: provides a set of tools for editing layers in the map area of the editor. Currently, the following tools are available:
| Name | Description | |
|---|---|---|
| Cursor |  | Select a tile or object |
| Tile |  | Place a tile |
| Object |  | Create an object |
| Object |  | Create a spawn point |
| Erasor |  | Erase a tile or object |
Creating a new map
A new map can be created either by loading one of the core game maps and save a copy (save as) or by creating a brand new one.
If you choose the latter, you can import the parallax backgrounds and tilesets from an existing map, by selecting Open/Import from the in-editor menu (opened by pressing esc), selecting a map from the list and clicking Import.
This will open a menu that let you select what tilesets you want to import and whether you want to import the background layers, as well.
Contributing
Fish Fight aims to be a highly contributor-friendly game. If you haven't already, please take some time to read the community guidelines.
Development Tracks
Our Tracks are ongoing projects with one or more leads. Some are permanent (e.g. Items or Editor) while others are temporary (e.g. Special Tiles or Physics). These are the recommended jumping-on points for new contributors.
Fields of contribution
Games are a synthesis of many different talents. Like most games, we're starting out code-heavy as we're building out the core functionality. Thanks to our deep focus on modding however, over time we expect contributions like level editing or pixel remixing to be even more plentiful and diverse than the field of coding.
Code 💻
If you're interested in making a change that will involve hacking on the game's source code, we have a quick reference on how to get started at Contributing Code!
Sub-tracks:
- Items
- Level Editor
- Special Tiles
- Juicing
- Physics (parent track missing)
- Infrastructure (parent track missing)
Pixels 🎨
There are three primary types of art assets in Fish Fight:
- Items
- Tiles & Objects
- Characters
Soon to be a proper book page: https://cdn.discordapp.com/attachments/785221806214479872/899304557979504650/How_to_draw_a_weapon_the_Fish_Fight_way.pdf
Any of our items labeled art-needed are missing an art asset.
Audio 🎶
SFX
Right now the easiest way in is to create new SFX for an item.
Prior art in https://github.com/fishfight/FishFight/tree/main/assets/sounds
Music compositions
Prior art in https://github.com/fishfight/FishFight/tree/main/assets/music
Game Design 👾
Items
See the Items track.
Levels
With the v1 completion of our upcoming Level Editor, it will be possible to create new levels from within the game itself.
Contributing Code to Fish Fight
Proposing code changes has 3 main steps:
- Setting up your development environment
- Pick an issue to work on
- Write code and submitting for review
1. Setting up your development environment
Before starting
Make sure Rust is installed with Rustup.rs.
Have an account on GitHub: this is where you'll find the source code for Fish Fight.
Getting the source code
Fish Fight uses git as its established choice of version control. You'll be using it to clone, track, and manage the source code locally on your machine.
To get a copy of the code, you'll first need to fork the repository. The GitHub repository for Fight Fight is available here. This will allow you to make changes to the project without affecting the original one.
Once you've forked the Fish Fight repository, you can now clone it:
git clone https://github.com/YOUR_ACCOUNT_NAME/FishFight.git
It's also possible to clone the repo using SSH or GitHub CLI. For more information on how to do this, see the official GitHub documentation.
Depending on your connection, the clone can take around 1 minute.
By the end of this step, you should have successfully forked and downloaded a clone of Fish Fight on your machine.
Build and run
You can now build your forked copy of Fish Fight:
cargo build
This process should take about a minute or two depending on your machine. You can also build and run the game with a single command:
cargo run
2. Finding a good first issue
Now that you can build and run Fish Fight source code, let's find something to work on! We recommend all newcomers start with our Development Tracks. You can also browse project's issues list and pick something with a help wanted label. In general, you can comment on an issue expressing interest and someone will assign it to you.
Additionally, if there's a track or issue you're particularly interested in, but you don't know where to start, feel free to reach out to the Fish Fight Discord community with your questions and someone should reach out shortly!
3. Write code and submitting for review
In general, Fish Fight uses a branch-based workflow (or GitHub flow) for submitting changes to the project.
Create a new branch
You'll want to create a new branch off main:
git checkout -b <branch_name> main
You'll replace <branch-name> with something short and descriptive. For example, if you're adding a new
item to Fish Fight, your branch name might look like this:
git checkout -b add_new_weapon main
Commit your changes
Once you've made the desired changes to the code and you're ready for someone on the Fish Fight team to review, you need to commit your work. But first, we have to run a few commands to ensure the code you're submitting is properly formatted:
cargo clippy -- -W clippy::correctness -D warningscargo fmt
Now we can start committing your work. First, stage your changes:
git add
Now commit. It's always good practice to provide a short message that details what the changes are. For example:
git commit -m "Add a new weapon"
Submitting for review
You can now start submitting your work for review. First, push your changes:
git push
This will create a new branch on your forked copy of Fish Fight. You can then proceed making a pull request. This is how the Fish Fight team will review and provide feedback on your work.
More information on contributing using GitHub.
Simple Gun Weapon
In this section we will walk through the process of adding a new gun weapon to Fish Fight. The instructions here will outline how we added the sniper rifle to the game, but our intent is for readers to follow along and be able to add their own gun weapons to the game.
Planning
Before jumping into the games code, it is a good idea to do some planning about what you want your new weapon to do. I determined that my sniper weapon should have the following properties:
- High bullet speed
- High recoil
- High range
- 2 bullets
Implementation
If you haven't already, fork FishFight and create branch with the name of the weapon you intend on adding. Then clone your forked repository, open the directory in your editor of choice, and checkout your new branch.
Defining the Item
To add any item to the game (including weapons), you will first have to define the item in a data file. These files are located in
assets/items and will typically have the same name as the item's id. Since we are creating a sniper rifle, we can give this file the
name sniper_rifle.json. This path to the file must also be added to assets/items.json, so that the game will know where to look
for it. This is done by simply adding the path (relative to items.json) to the array within the file. In this case, the path
that we add will be items/sniper_rifle.json.
[
  ...
  "items/sniper_rifle.json",
]
Now, it is time to define the weapons parameters inside the sniper_rifle.json file. Begin by creating a new object using curly braces and adding the item's id (sniper_rifle) and the item's type (weapon):
...
{
  "id": "sniper_rifle",
  "type": "weapon",
}
...
Every item that we add will also need a set of sprite parameters (SpriteParams) that define the sprite that will be drawn
when the item is on the ground, before being picked up by the player. Typically, all that is need here is the textures id,
as attributes like sprite size will most often be defined in the texture's entry in the assets/textures.json file. At this point is easiest to use an existing sprite in the game as a placeholder. For now, we'll set the sprite of the sniper rifle item to be the musket sprite.
{
  "id": "sniper_rifle",
  "type": "weapon",
  "sprite": {
    "texture": "musket"
  },
}
The item will also need a collider defined for it. A collider is a rectangular boundary around the position of the item that is used for checking whether a player is close enough to pick it up. We'll set the collider for the sniper rifle to be a 16 by 16 box.
{
  "id": "sniper_rifle",
  "type": "weapon",
  "sprite": {
    "texture": "musket"
  },
  "collider_size": {
    "x": 16,
    "y": 16
  },
}
This is all the required data for the item part (ItemParams) of our definition. Next, we need to add the parameters required for weapon items.
Adding Weapon Parameters
We have quite a few options for customization that can be explored by looking at the WeaponParams struct in the source code.
First we'll add any attributes for the weapon that describe it's behavior. As we said at the beginning of the section, we wanted the sniper rifle to have high recoil, and 2 uses. We can add these to sniper_rifle.json. We'll set uses to 2 so that the sniper rifle can be shot twice and we'll set recoil to 1400 so that the player will be knocked back significantly when the gun is fired.
{
  "id": "sniper_rifle",
  "type": "weapon",
  "sprite": {
    "texture": "musket"
  },
  "collider_size": {
    "x": 16,
    "y": 16
  },
  "uses": 2,
  "recoil": 1400.0,
}
Next we'll need to define more subtle values that also will effect the behavior of the sniper rifle weapon: cooldown and attack_duration. cooldown is a period of time that governs how frequently the weapon can be used and attack_duration is the amount of time the player is locked in the attack state (input blocked) when the weapon is used. For the sniper rifle we'll set cooldown to 1.5 and attack_duration to 1.0.
{
  "id": "sniper_rifle",
  "type": "weapon",
  "sprite": {
    "texture": "musket"
  },
  "collider_size": {
    "x": 16,
    "y": 16
  },
  "uses": 2,
  "recoil": 1400.0,
  "cooldown": 1.5,
  "attack_duration": 1.0,
}
Next, we can add a sound_effect that will played when the weapon is used. You add a new sound by putting a sound file in assets/sounds and registering it with id in assets/sounds.json, but for the sniper rifle weapon, we can use the same sound effect for the musket called "shoot".
{
  "id": "sniper_rifle",
  "type": "weapon",
  "sprite": {
    "texture": "musket"
  },
  "collider_size": {
    "x": 16,
    "y": 16
  },
  "uses": 2,
  "recoil": 1400.0,
  "cooldown": 1.5,
  "attack_duration": 1.0,
  "sound_effect": "shoot",
}
Next we'll define the active effects (ActiveEffectParams) of the weapon, or in other words, what happens when the weapon is used. In this case, we want the sniper rifle to shoot a projectile, so we will put projectile in the type field under effects. Then, also under effects we need to define the projectile effect. First we'll set the projectile's type to sprite and define the sprite with a texture of the already existing small_projectile with a size of 8 by 4. Here, we can also give the projectile a tint.
{
  "id": "sniper_rifle",
  "type": "weapon",
  "sprite": {
    "texture": "musket"
  },
  "collider_size": {
    "x": 16,
    "y": 16
  },
  "uses": 2,
  "recoil": 1400.0,
  "cooldown": 1.5,
  "attack_duration": 1.0,
  "sound_effect": "shoot",
  "effects": {
    "type": "projectile",
    "projectile": {
      "type": "sprite",
      "sprite": {
        "texture": "small_projectile",
        "size": {
          "x": 8,
          "y": 4
        },
        "tint": {
          "r": 0.9,
          "g": 0.75,
          "b": 0.12,
          "a": 1.0
        }
      }
    },
  },
}
This is the place where we can implement the remaining attributes that we outlined at the top of the file: high bullet speed, and high range. We'll give the projectile a range of 600 and a speed of 25.
{
  "id": "sniper_rifle",
  "type": "weapon",
  "sprite": {
    "texture": "musket"
  },
  "collider_size": {
    "x": 16,
    "y": 16
  },
  "uses": 2,
  "recoil": 1400.0,
  "cooldown": 1.5,
  "attack_duration": 1.0,
  "sound_effect": "shoot",
  "effects": {
    "type": "projectile",
    "projectile": {
      "type": "sprite",
      "sprite": {
        "texture": "small_projectile",
        "size": {
          "x": 8,
          "y": 4
        },
        "tint": {
          "r": 0.9,
          "g": 0.75,
          "b": 0.12,
          "a": 1.0
        }
      }
    },
    "range": 600.0,
    "speed": 25.0
  },
}
The next step is to add the animation for the sniper rifle weapon to the json object. For now, we will give the sniper the same animation as the musket. We can set the texture of the animation to musket and define the idle and attack animation sequences by providing a row in the spritesheet, the amount of frames in the animation, and the speed (fps: frames per second) of the animation.
{
  "id": "sniper_rifle",
  "type": "weapon",
  "sprite": {
    "texture": "musket"
  },
  "collider_size": {
    "x": 64,
    "y": 24
  },
  "uses": 2,
  "cooldown": 1.5,
  "attack_duration": 1.0,
  "recoil": 1400.0,
  "sound_effect": "shoot",
  "effect_offset": {
    "x": 64,
    "y": 16
  },
  "effects": {
    "type": "projectile",
    "projectile": {
      "type": "sprite",
      "sprite": {
        "texture": "small_projectile",
        "size": {
          "x": 8,
          "y": 4
        },
        "tint": {
          "r": 0.9,
          "g": 0.75,
          "b": 0.12,
          "a": 1.0
        }
      }
    },
    "range": 600.0,
    "speed": 25.0
  },
  "animation": {
    "texture": "musket",
    "animations": [
      {
        "id": "idle",
        "row": 0,
        "frames": 1,
        "fps": 1
      },
      {
        "id": "attack",
        "row": 1,
        "frames": 3,
        "fps": 15
      }
    ]
  }
}
The last thing that we need to add to the json object definition of the sniper rifle weapon is an effect_animation. This is a visual effect that is shown. For the sniper rifle, we want to see a "blast" effect from the end of the barrel of the sniper when the weapon is used (just like for the musket). To implement this we can add effect_animation to the json object. First, we can set the texture to musket and provide an animation called attack_effect with the correct row, frames, and fps.
{
  "id": "sniper_rifle",
  "type": "weapon",
  "sprite": {
    "texture": "musket"
  },
  "collider_size": {
    "x": 64,
    "y": 24
  },
  "uses": 2,
  "cooldown": 1.5,
  "attack_duration": 1.0,
  "recoil": 1400.0,
  "sound_effect": "shoot",
  "effect_offset": {
    "x": 64,
    "y": 16
  },
  "effects": {
    "type": "projectile",
    "projectile": {
      "type": "sprite",
      "sprite": {
        "texture": "small_projectile",
        "size": {
          "x": 8,
          "y": 4
        },
        "tint": {
          "r": 0.9,
          "g": 0.75,
          "b": 0.12,
          "a": 1.0
        }
      }
    },
    "range": 600.0,
    "speed": 25.0
  },
  "animation": {
    "texture": "musket",
    "animations": [
      {
        "id": "idle",
        "row": 0,
        "frames": 1,
        "fps": 1
      },
      {
        "id": "attack",
        "row": 1,
        "frames": 3,
        "fps": 15
      }
    ]
  },
  "effect_animation": {
    "texture": "musket",
    "animations": [
      {
        "id": "attack_effect",
        "row": 2,
        "frames": 4,
        "fps": 12
      }
    ]
  }
}
If you like, you can skip to the testing section to test your new weapon, but if you haven't added a new texture or modified an existing texture, you will not be able to visually recognize your item before picking it up. For this reason, I recommend you continue to the Texture section next.
Texture (Optional)
It is important to make sure that your weapon is able to be visually distinguished between the other weapons in the game. When we created the sniper rifle object, we used the musket texture for the sprite, animation, and effect_animation. In this section we will create a new custom texture for the sniper rifle and register it in assets/textures.json, then we will change assets/items/sniper_rifle.json to use this new texture.
To start off I'll copy the musket spritesheet image, assets/textures/items/Musket(92x32), the "92x32" in the file name indicates that the size of each frame on the sprite sheet. I'll open this file with my pixel editor of choice, Aseprite (GIMP would also work fine).
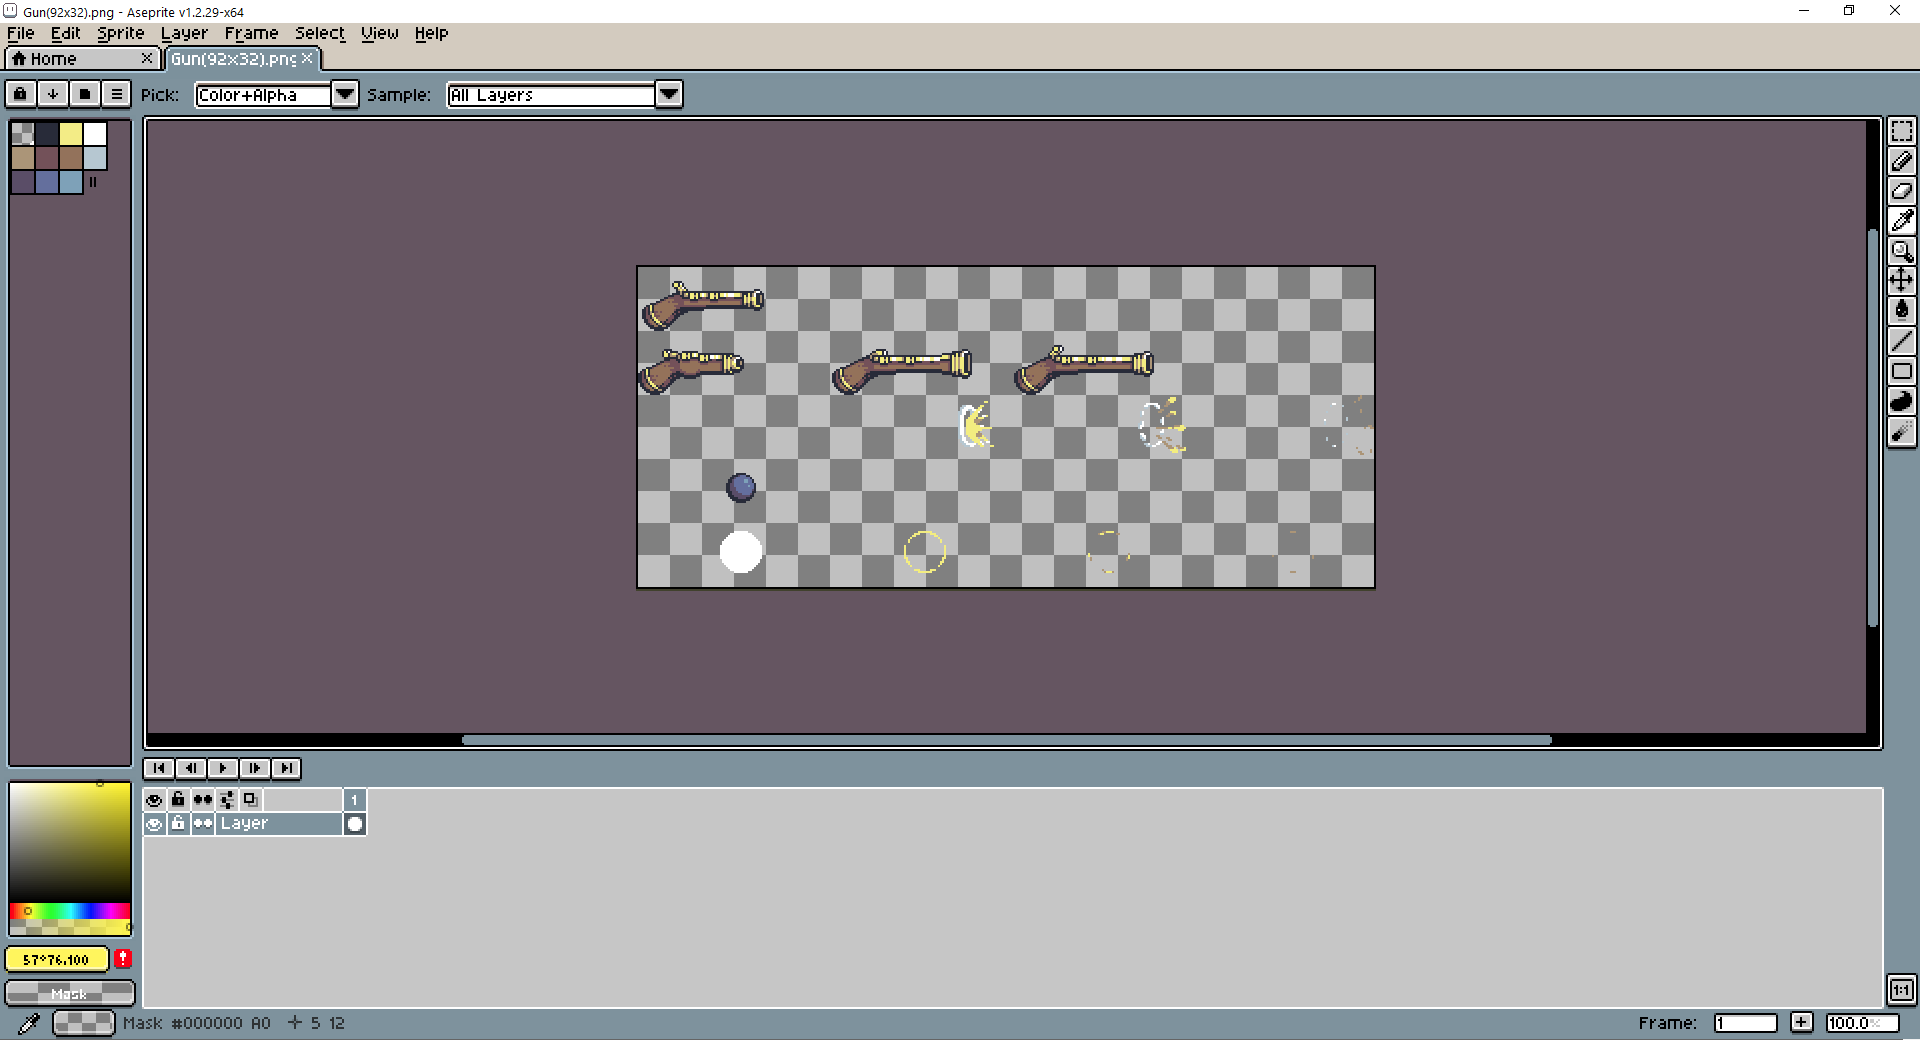
I don't consider myself an artist so I'm just going to modify the hue of the golden part of the gun texture to a reddish color. First I'll select a color range and adjust the threshold to select only the golden part of the gun texture.
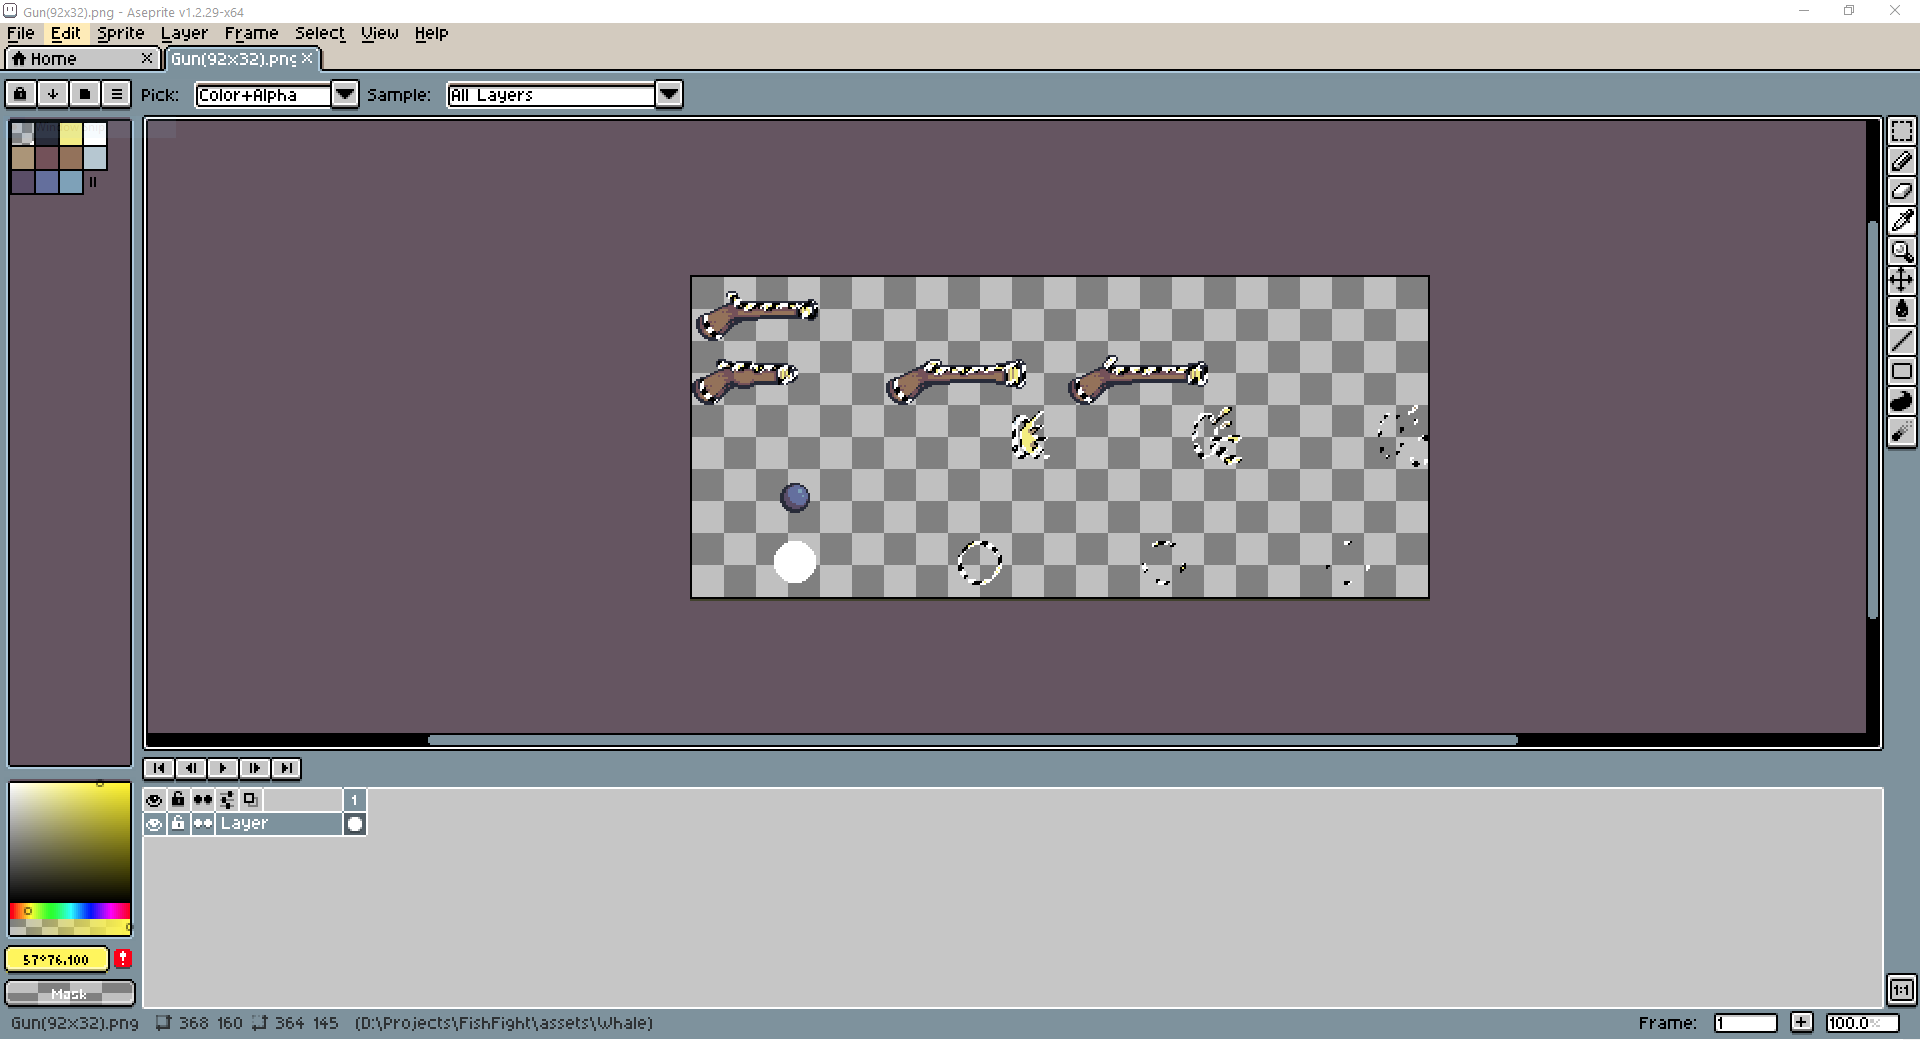
Then I'll adjust the hue of the selected colors to turn all of the gold color red.
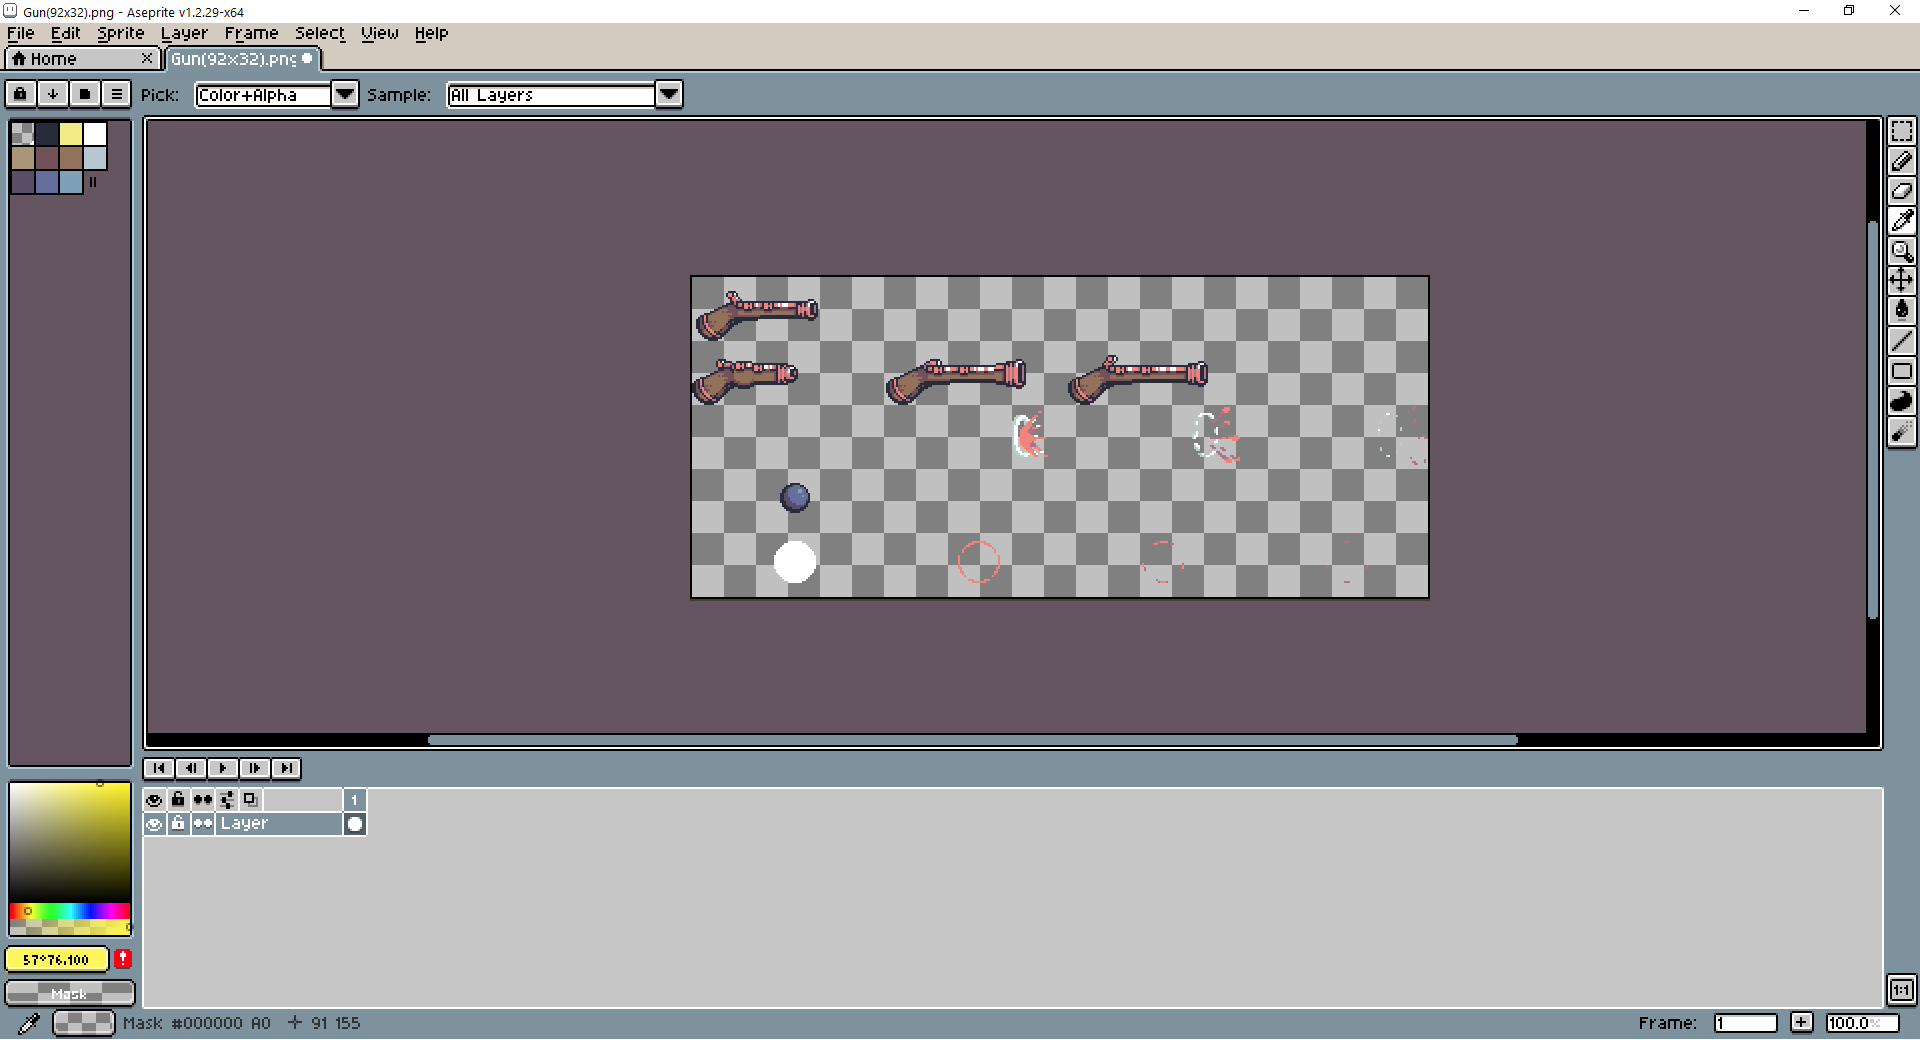
This texture is now distinguishable from the other gun textures in the game.
This, of course, is just one way of distinguishing the texture from the other textures in the game. Feel free to copy and modify textures using your own methods, or if you feel inclined, make your own unique texture for your weapon!
Now, all that remains is to add the new texture to the game. This is done by copying the texture file to the assets/textures/items directory and adding an entry to the file assets/textures.json.
Assuming a texture file name of SniperRifle(92x32).png, the following entry should be added to assets/textures.json:
...
{
  "id": "sniper_rifle",
  "path": "textures/items/SniperRifle(92x32).png",
  "type": "spritesheet",
  "sprite_size": {
    "x": 92,
    "y": 32
  }
}
...
You will also have to change your weapons data file, so that it references this new texture, "sniper_rifle", instead of "musket". This is done by changing the "texture" fields of your weapon's "sprite", "animation", and "effect_animation" members to "sniper_rifle".
Size (Optional)
Sprite
This section will go over how to go beyond changing the hue of an existing sprite to also changing the size of your new item's sprite. For my sniper, I want to change the length of the sprite in the x direction so the sniper will look significantly longer than the musket.
To start off, I'll open my existing sniper rifle texture (assets/textures/items/SniperRifle(92x32).png) in Aseprite. Then, to visualize the tiled sprites, I use Aseprite's grid feature (View > Grid Settings) to draw boxes around them. The size of the sprite sheet's tiles are the x and y values defined in assets/textures.json or included in the name of the texture file name. The size of the sprites in the sniper rifle texture is currently 92 (x) by 32 (y). In Aseprite I can enter these dimensions for width and height in the Grid Settings dialogue box. After entering these values, a grid will appear around the sprites as shown below.
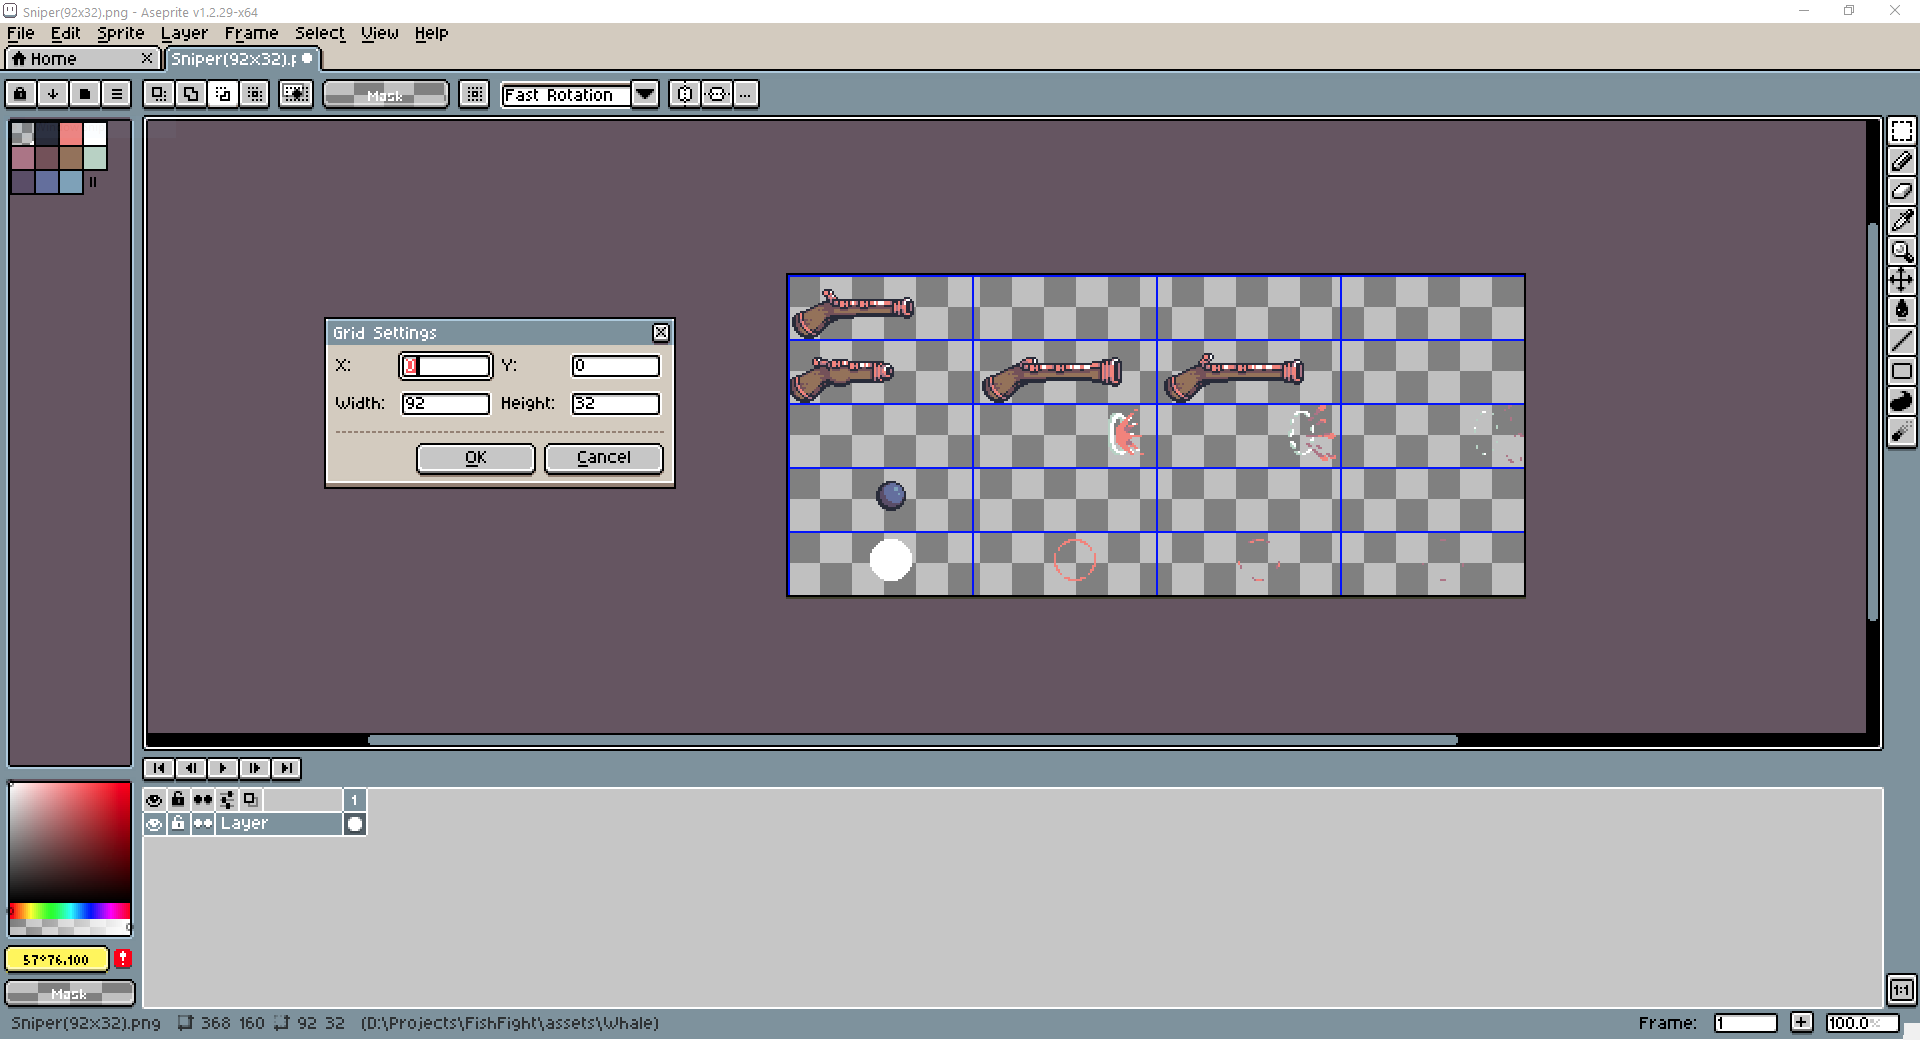
Next, I need to determine by how much I want to change the sprite dimensions. For my sniper rifle, I only want to change the width of the sprite so that it has a longer barrel than the musket. Arbitrarily, I chose to extend the width of the spite by 20 pixels. This will make my new sprites' tiles dimensions 112 wide by 32 tall.
Now I need to do a little math to determine the size of the new spritesheet. Since the old spritesheet had 4 sprites across and 5 sprites up, the new spritesheet size will be (112 X 4) wide by (32 x 5) tall. This comes out to 448 wide by 160 tall. I'll create a new sprite sheet in Aseprite with these dimensions. With the new sprite sheet open in Aseprite, I'll again show the grid (View > Grid Settings), but this time with my new frame dimensions, 112 wide by 32 tall.

Next, one at a time, we can copy sprite frames from the old sprite sheet into the new one and modify them to fit the new weapon. I tried my best to match the art style of the musket and just add a 20 pixel long section of barrel to make the sniper rifle appear longer. Below is my new completed sprite sheet.
![]()
After you are done modifying the sprite sheet save the new sprite sheet as the name of your item followed by the dimensions of the each frame in the spritesheet surrounded by parentheses. I named my new sniper rifle sprite sheet SniperRifle(112x32).png and saved it into the the assets/items/textures directory.
The final step is to now change assets/textures.json to use the new sniper rifle spritesheet. I changed the "path" field use the name of the new file, and I changed the "x" and "y" dimensions in the "sprite_size" field to the new dimensions of the sniper rifle's frames:
  ...
  {
    "id": "sniper_rifle",
    "path": "textures/items/SniperRifle(112x32).png",
    "type": "spritesheet",
    "sprite_size": {
      "x": 112,
      "y": 32
    }
  },
  ...
Testing
The last thing we need to do is put our new weapon in the game and test it! Fish Fight's levels are defined in json files in the assets/maps directory. For testing items, there is a test level in the game defined in a file called test_level.json. Open this file.
In this file you will see a long list of item entries containing data about items that are placed in the level. The easiest way to add your new weapon to this level is to replace the "name" field of one of other items currently in the level with the id of your new weapon (referred to as your_weapon throughout this chapter). Here is the entry for my sniper weapon.
...
{
    "draworder":"topdown",
    "id":5,
    "name":"items",
    "objects":[
        ...
        {
            "height":0,
            "id":147,
            "name":"sniper_rifle",
            "point":true,
            "rotation":0,
            "type":"item",
            "visible":true,
            "width":0,
            "x":400,
            "y":690
        },
        ...
    ],
    ...
}
If you followed all of these steps correctly, your new weapon should be in the game. Run the game using cargo run, then select the test level. You should see your gun in the level and be able to try it out.
Now all you need to do is modify the values in src/items/your_weapon.rs until the weapon feels right to you! Then you are ready to make a pull request.
Contributing Art
This guide will show you the steps to draw art using the Fish Fight style. Following these steps will help your custom art fit better in the Fish Fight world. For this example, we will focus on creating a cannon weapon, but these principles can be applied to other assets as well. If you are completely new to pixel art, make sure to take a look at the Additional Resources section first.
Concept
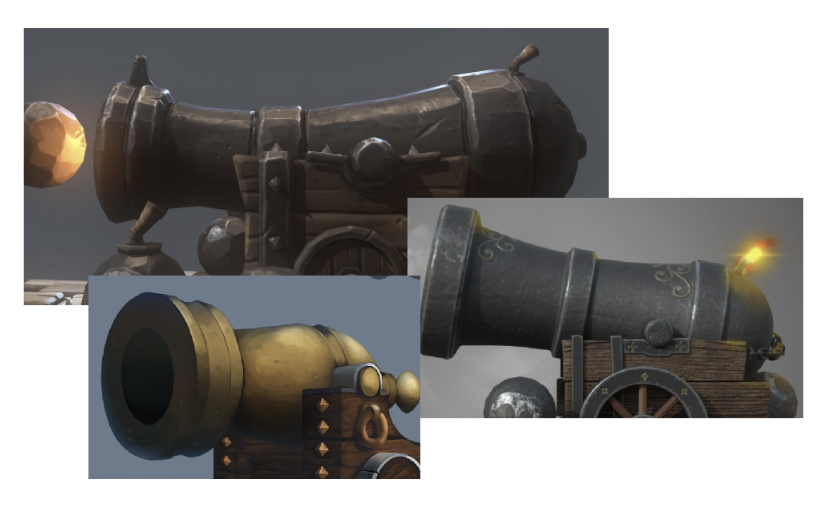
Before you start drawing, you need to have a clear idea of what it is you are creating. We recommend finding a few reference images that you can look at while creating your art. Even the best artists do this. Drawing something completely from memory tends to not give the best results. Below are some reference images we found for cannons.
Outline
Now that you have some references, you can start drawing your art! To start off, draw an outline of the object's prominent features. Keep outlining more details until it is recognizable as the object you are creating. Below is the outline for the cannon weapon:
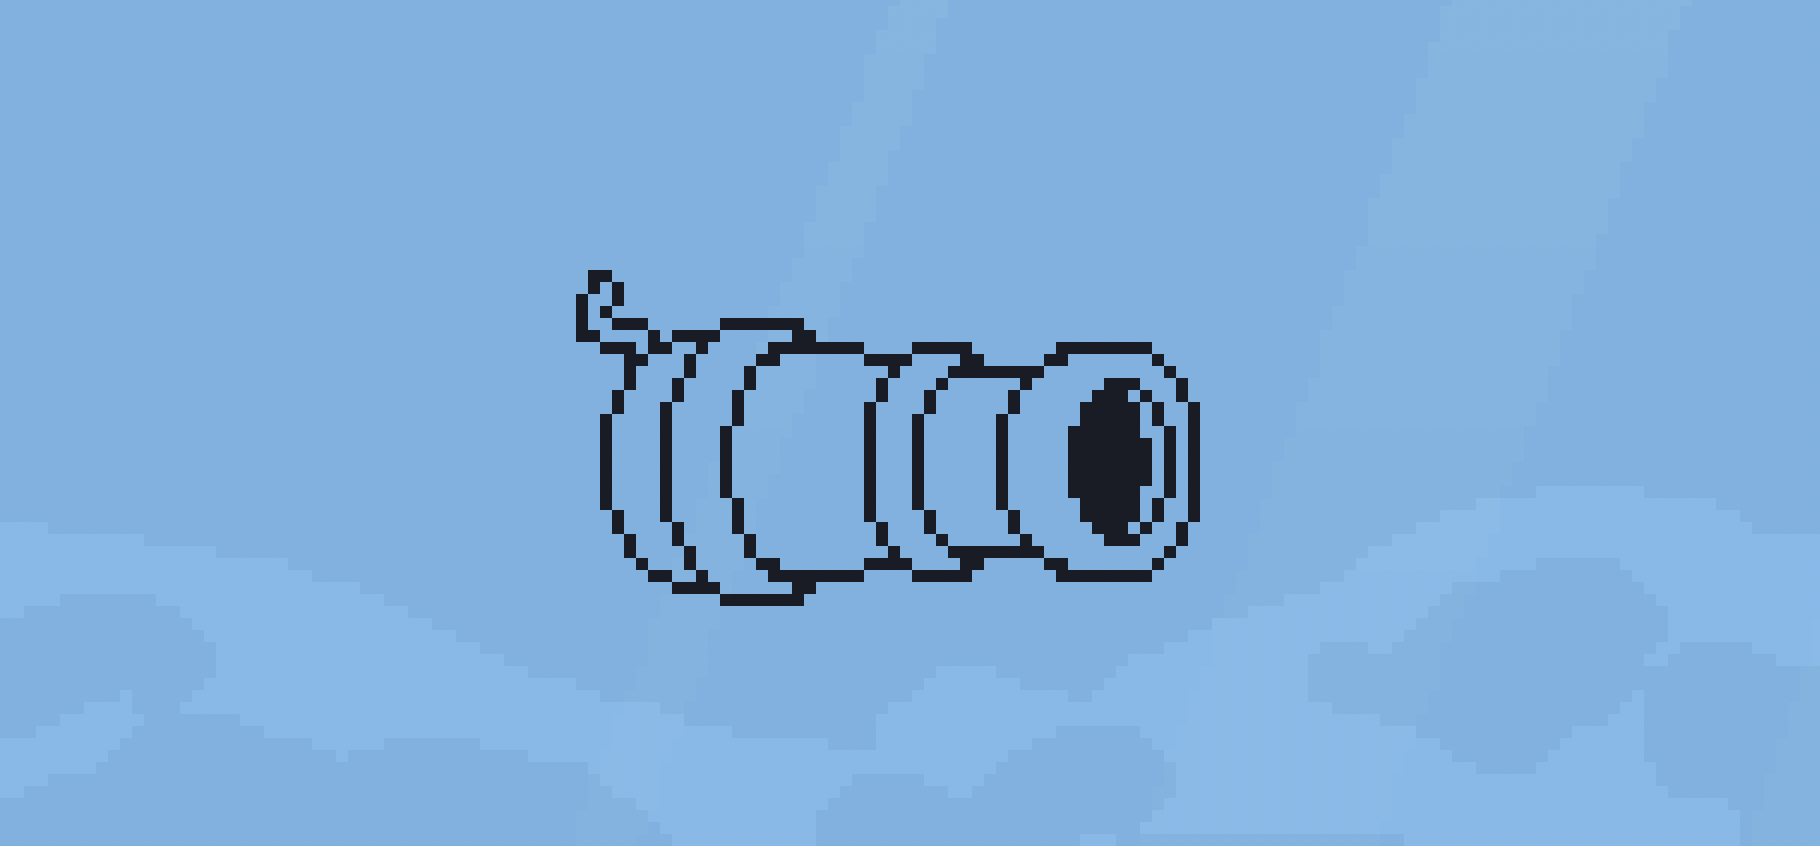
Here are the guidelines we use for outlining:
- All details for the object should be completely surrounded by outlines
- All outlines should be 1 pixel thick
- Outlines should use a dark color
- Generally, all outlines should be the same color
- Only non-solid materials like smoke, fire, etc. should be drawn without outlines
- If the object has holes, make them the same color as the outline
Color
After you've finished outlining your object you are ready to begin coloring. Below is the cannon weapon after being colored:
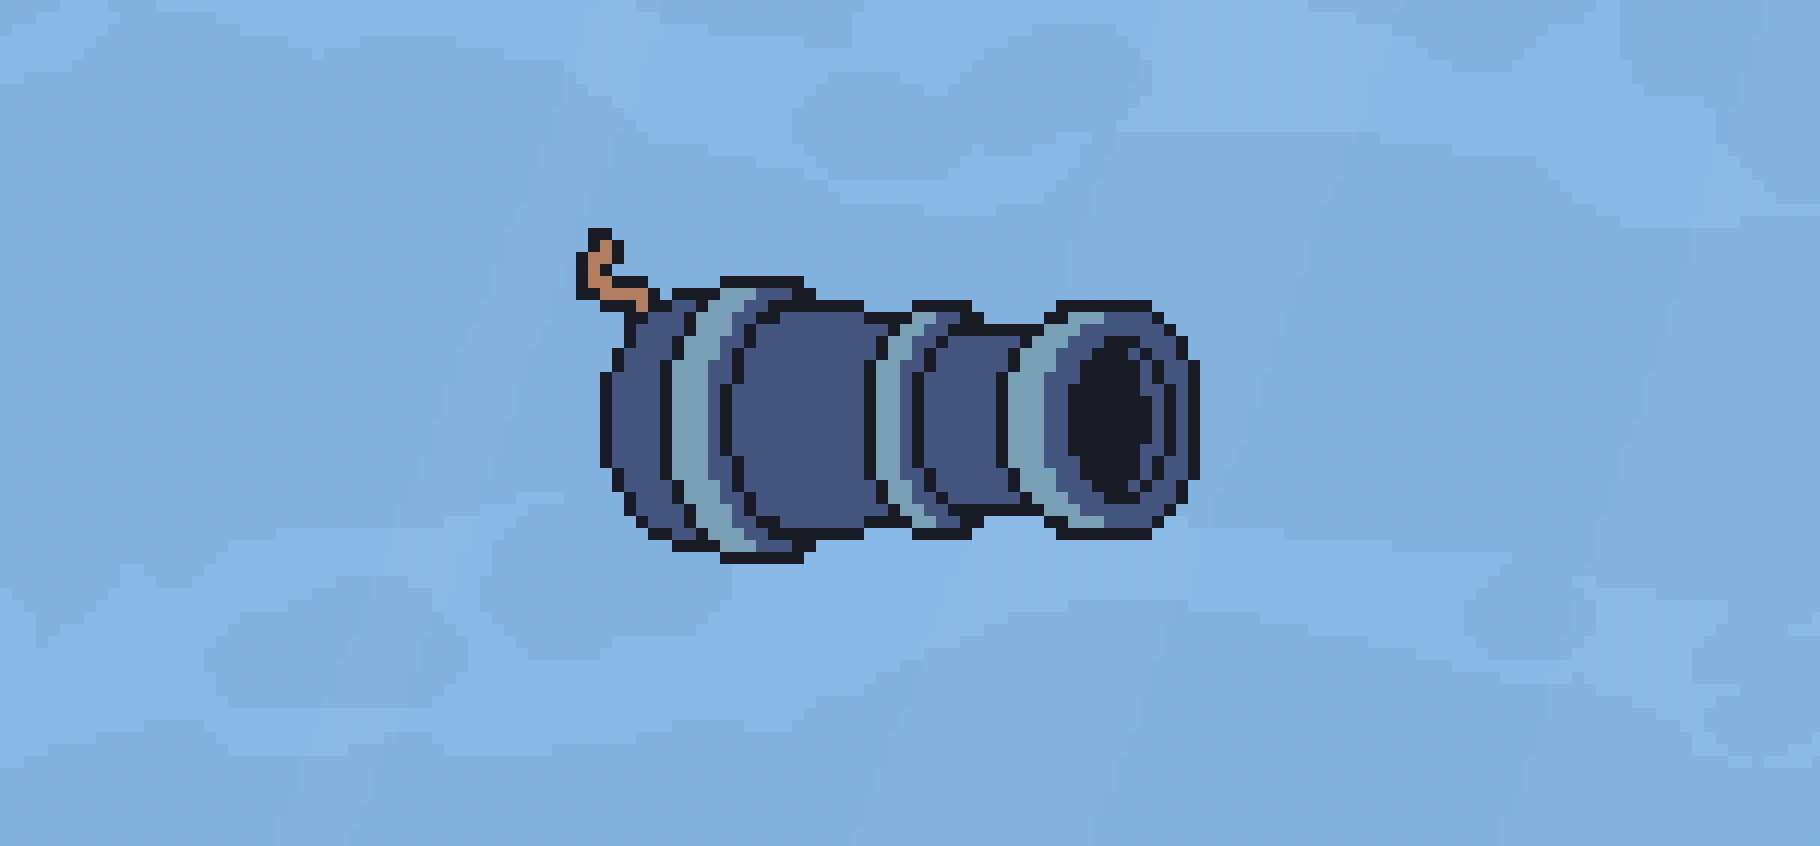
Here are the guidelines we use for applying color:
- Use colors that have a similar saturation level with game's existing assets
- Use contrasting colors to distinguish different parts of the object
- The entire object should be filled with color (no transparency)
Shadows and Details
After coloring, shadows and details can be added to the object, but try to keep it clean and recognizable. Below is the cannon after adding shadows and details.

Here are the guidelines we use for adding shadows and details:
- For contrasting shadows, use one light and one dark color
- Use hue shifting to create color ramps
- Avoid anti-aliasing
Conclusion
Below is the full process for creating the cannon art:
Additional Resources
If you are new to pixel art, we recommend that you take a look at these tutorials to learn the basics first.
We hope this guide was helpful for understanding the Fish Fight art style. If you have any more questions feel free to ask on the #pixels Discord channel.
Documentation
Screen Shake
Screen shake in FishFight is accessed through the Camera node in the scene. It has multiple functions to apply different kinds of noise.
To camera node is accessed as follows:
#![allow(unused_variables)]
fn main() {
let mut camera = scene::find_node_by_type::<crate::game::GameCamera>().unwrap();
}
Unless you use the camera multiple times, it's better to not assign it to a variable but to use the value straight away:
#![allow(unused_variables)]
fn main() {
let mut camera = scene::find_node_by_type::<crate::game::GameCamera>().unwrap().shake_noise(magnitude, length, frequency);
}
This prevents some ownership issues that would otherwise require separate scopes.
Parameters
magnitude: How far the shake moves the screen in pixels. Values around 10-20 are sane.
length: For how long the shake will last in frames. The magnitude is multiplied by age/length to fade the shake over time.
frequency: 1 is normal, 0.2 is a punch. With a frequency of 0.2 and length of 10 frames it will oscillate max twice. 0.5 is more of a rumble. Worth noting is that shake_sinusodial has a different base frequency.
See this for more information.
Noise types
#![allow(unused_variables)]
fn main() {
camera.shake_noise(magnitude: f32, length: i32, frequency: f32);
}
Shakes the screen around randomly using Perlin noise. Applicable for almost anything.
#![allow(unused_variables)]
fn main() {
camera.shake_noise_dir(magnitude: f32, length: i32, frequency: f32, direction: (f32, f32));
}
Like shake_noise, but the X and Y components of the resulting shake will be multiplied by the direction tuple. Can be used to make the screen shake more on one axis than the other, or only on one axis.
#![allow(unused_variables)]
fn main() {
camera.shake_sinusoidal(magnitude: f32, length: i32, frequency:f32, angle: f32);
}
Shakes the screen sinusoidally along the angle given in radians.
#![allow(unused_variables)]
fn main() {
camera.shake_rotational(magnitude: f32, length: i32);
}
Rotates the scene around the screen's centre. Combines well with other types of screen shake for extra punchiness.
Particles
FishFight uses macroquad's macroquad-particles for simulating and drawing particles. While it might seem simple, it is deceptively so. With a little creativity plenty impressive effects can be created!
Also see the the particle section of the juice page.
The components of a particle effect
A particle effect consists of several parts that must be set up as following:
First, you need to design your effect! Each effect has a json file that describes how the system spawns, looks, flies, brakes and fades. Check out some of the other effects in assets/particles/, or easier, try Fedor's tool with previews and live tweaking to generate the file for you.
Now that you got your particle system definition, give it a descriptive name and put it in assets/particle_effects/ with the others. Then open assets/particle_effects.json (a file, not a directory this time) and add your particle effect to it. Preferably use the same ID as your filename, excluding the extension. This tells the game to load your effect into the Resources object, so you can actually access it.
Spawning a particle
The easiest way to use your particle is through an effect that spawns a particle system. Just supply the ID of your effect in the JSON-definition of your object and the item's code will handle the rest. It can look something like this, depending on the effect:
"effects": [
	...
	{
		"type": "particle_controller",
		"id": "0",
		"particle_id": "musket_muzzle_smoke",
		"start_delay": 1,
		"is_can_be_interrupted": true,
		"amount": 6,
		"interval": 0.05
	},
	...
]
Spawning in code
Soon you'll probably want to trigger particle effects from your own code. You do that as following:
#![allow(unused_variables)]
fn main() {
scene::find_node_by_type::<ParticleEmitters>().unwrap().spawn("particle_id_here", position: Vec2);
}
If you want to spawn multiple systems, you can store a reference:
#![allow(unused_variables)]
fn main() {
let mut particles = scene::find_node_by_type::<ParticleEmitters>().unwrap();
}
You can also use a ParticleController which manages spawning particles over time for you, useful for leaving trails (this is currently used for the smoke puffs left behind bullets). Its new-constructor takes a ParticleControllerParameters, where you can control spawn rates and such. It is documented in the code. Note that the ParticleController has an update() function that has to be called each frame to make it tick.
Releases
0.3
What's Changed
Gameplay
- New items!
- Blunderbuss
- Blunderbass
- Cannon
- Crate
- Grenades
- Kick-Bomb
- Machine Gun
- Mines
- Sniper Rifle
- Sword
- Turtle Shell
- New Characters!
- Pescy
- Sharky
- Orcy
- Fishy
- Reworked the game's menus
Development
- Overhauled system for implementing items.
- Items now primarily implemented through JSON files.
- Read the Simple Gun Weapon section in the Contributing chapter for more details.
- New level editor!
- Create new levels for FishFight in-game
- Import tiled maps
- Read the Editor chapter for more details.
- Dynamic loading of assets through JSON manifest files.
- Created a book for everything FishFight (still a WIP)
- Gameplay
- Contribution guides
- Mechanics
- and more!
What's Next
The new item system and dynamic asset loading will facilitate user mods for an upcoming release.